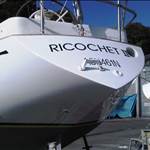
I've had Mawson out of the water for almost two months now, it's been a mission! High word count warning!!
So I've scraped and sanded antifouling back to a solid base. Man it was thick and lumpy and cratered and I'd be very happy to never have to do that again

. Some large patches of antifoul weren't properly bonded and they flaked back to the barrier or gel coat. It looks like no tie coat was used and on a previous occasion they'd tried getting a chemical bond with the barrier coat. Talking with the Wattyl rep down here, that is possible if you get your timing spot on, but Wattyl won't guarantee it, they want the tie coat over the barrier coat, then the antifoul layers. So I treated all those areas with Wattyl PR 250 barrier/undercoat, then tie coat, then 3 coats of antifoul all over.
I also removed the rudder. There was quite a bit of wear and play in the lower part of the rudder bearing, it's a 70mm ID bronze tube around 30cm high that's fiberglassed into the hull, and the bottom of the tube was slogged out causing the rudder to knock sometimes. Both the top end of that tube and the upper bearing bronze bush mounted in the cockpit floor were ok and not worn. I followed the West System epoxy repair method for this fix. It's an epoxy, colloidal silica and graphite mixture which I smeared up into the cleaned and keyed section of the bush along with a length of HDPE machined to 70mm and inserted as a dummy shaft into the entire bush right up to the top bush in order to keep alignment while the epoxy set. It seems to have worked, it looks and feels solid, but time will tell...
On inspecting the rudder itself, there was clearly water intrusion and I reckon a good litre drained out. I could see a crack in the upper part of the rudder running out from the stock, so it looks like its been heavily stressed at some time. As well as this, there was some corrosion around the stock and top of rudder body interface. So I cut a big hunk out and opened up the top part of the rudder and stock, (it's one of those dough filled constructions and there were some cracks running through the dough allowing water penetration). I probably opened up a notch 25 x 25 cm or so. I just wanted to get a good look at what corrosion was on the shaft internally. And while there was a little light surface corrosion, there wasn't anything nasty. I had the local metal expert look at it and he wasn't concerned. So that was a much better outcome than having to mold and then remake the rudder entirely. I cut some slots in the bottom of the rudder and continually flushed fresh water through it over a couple of weeks and then let it dry out. Then I filled in the cut out section with an epoxy and balloons mix, and re fiberglassed the sides and top to strengthen and seal it all up again. The whole rudder was completely stripped back to gel coat, faired with compound and coated with barrier coat. At this point I ran a bead of Sikka around the shaft to rudder intersection, my thinking is that this may offer a bit more of a flexible barrier if there's any extra stress and bumps to the rudder and may keep it sealed and waterproof a bit longer. It's a big hunk of spade rudder on the Scanner 391 and I imagine that loosing control of it in reverse, and having it slam over, would put enormous stress on it.
Over the last few days I've moved the engine and lifted the saildrive out so that I can change the seals. Volvo recommend every 7 years. The seal itself looks absolutely fine though and you hear about them still being fine after 15 years or more. But if it were to fail and sink the boat, the insurance company would probably have grounds to reject a claim I imagine? The most time consuming part of the engine removal was getting the darn hoses off their spigots, talk about tedious. I must have taken an hour just to get the exhaust hose off the heat exchanger. I also faffed about for ages trying to coax the sail drive out of the hole in the hull, but no matter which way I angled and twisted it, it just wasn't going to work. And that wasn't at all like how easy it seemed on YouTube
. I finally twigged that I needed to remove the lower prop shaft/ gear assembly (10 min job), then it lifted out easily. I'm sure if I did this all again it would only take half the time or less, it just takes so long first time round with this stuff doesn't it?
Still more to do, to be continued... can't wait to go sailing again!