Fitting Tuttle Fin

A week ago
Reply
Register to post, see what you've read, and subscribe to topics.
kuotadriver
kuotadriver
70 posts
70 posts
4 Jul 2026 9:50am
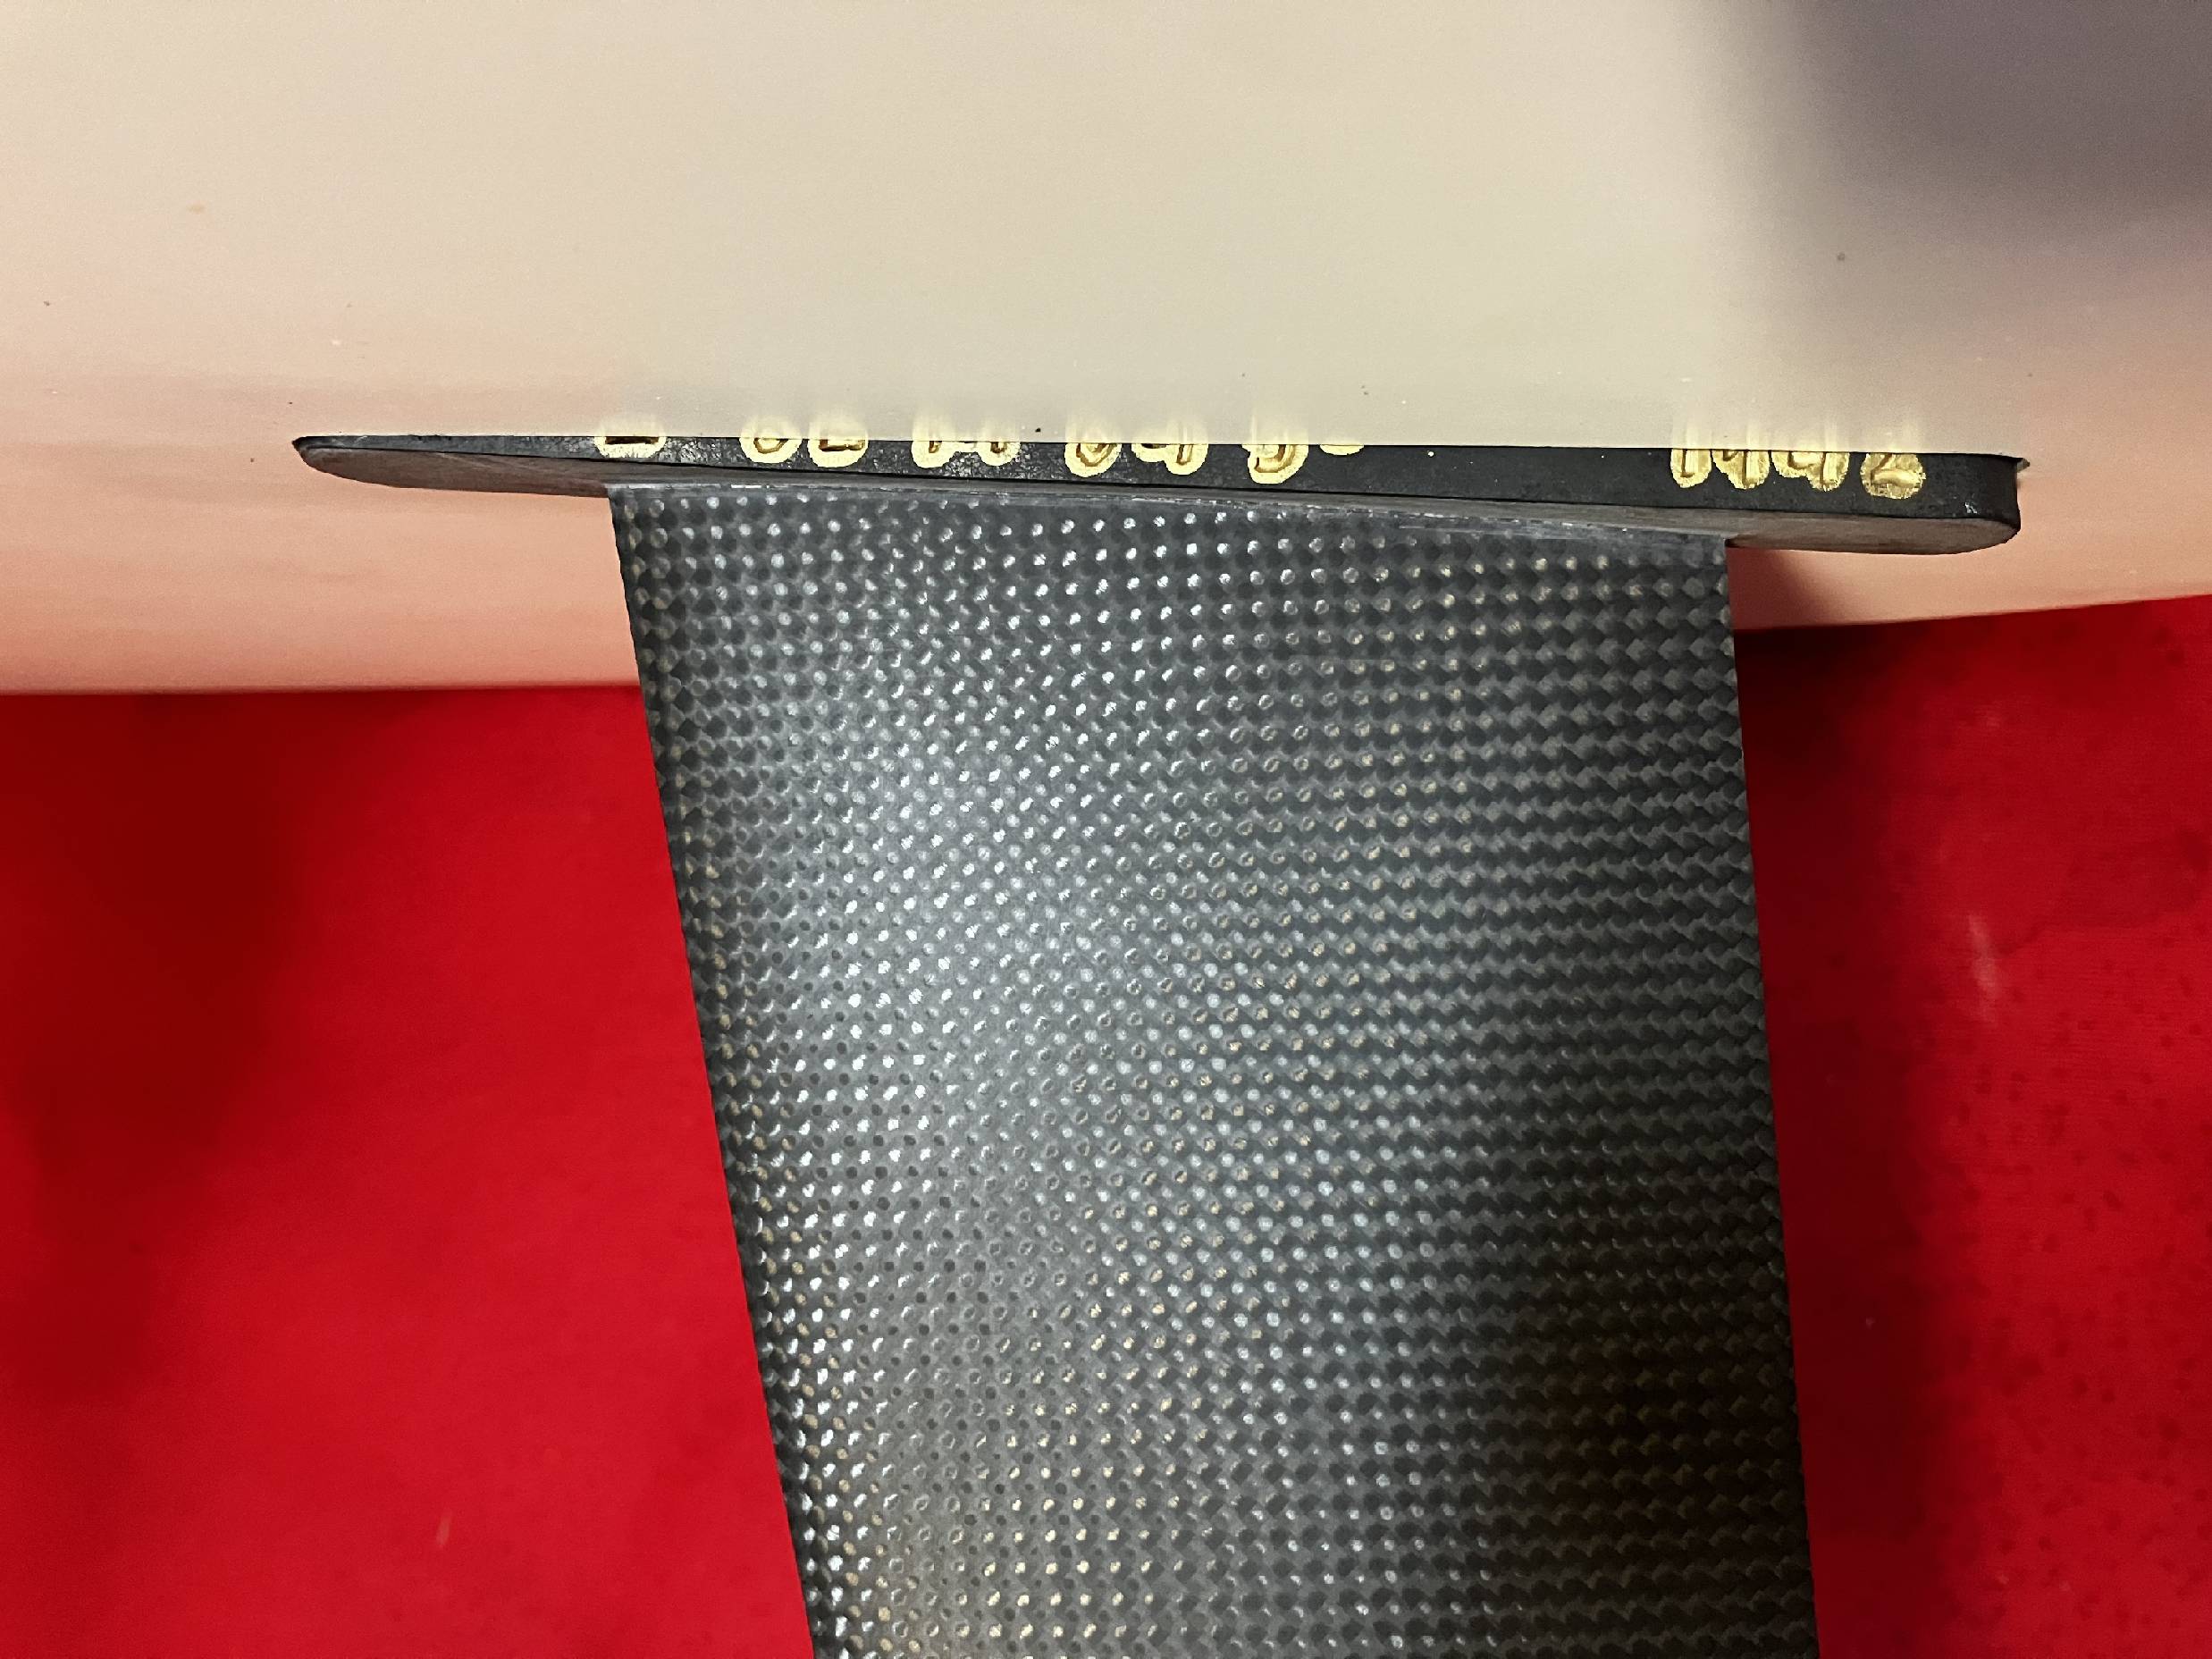
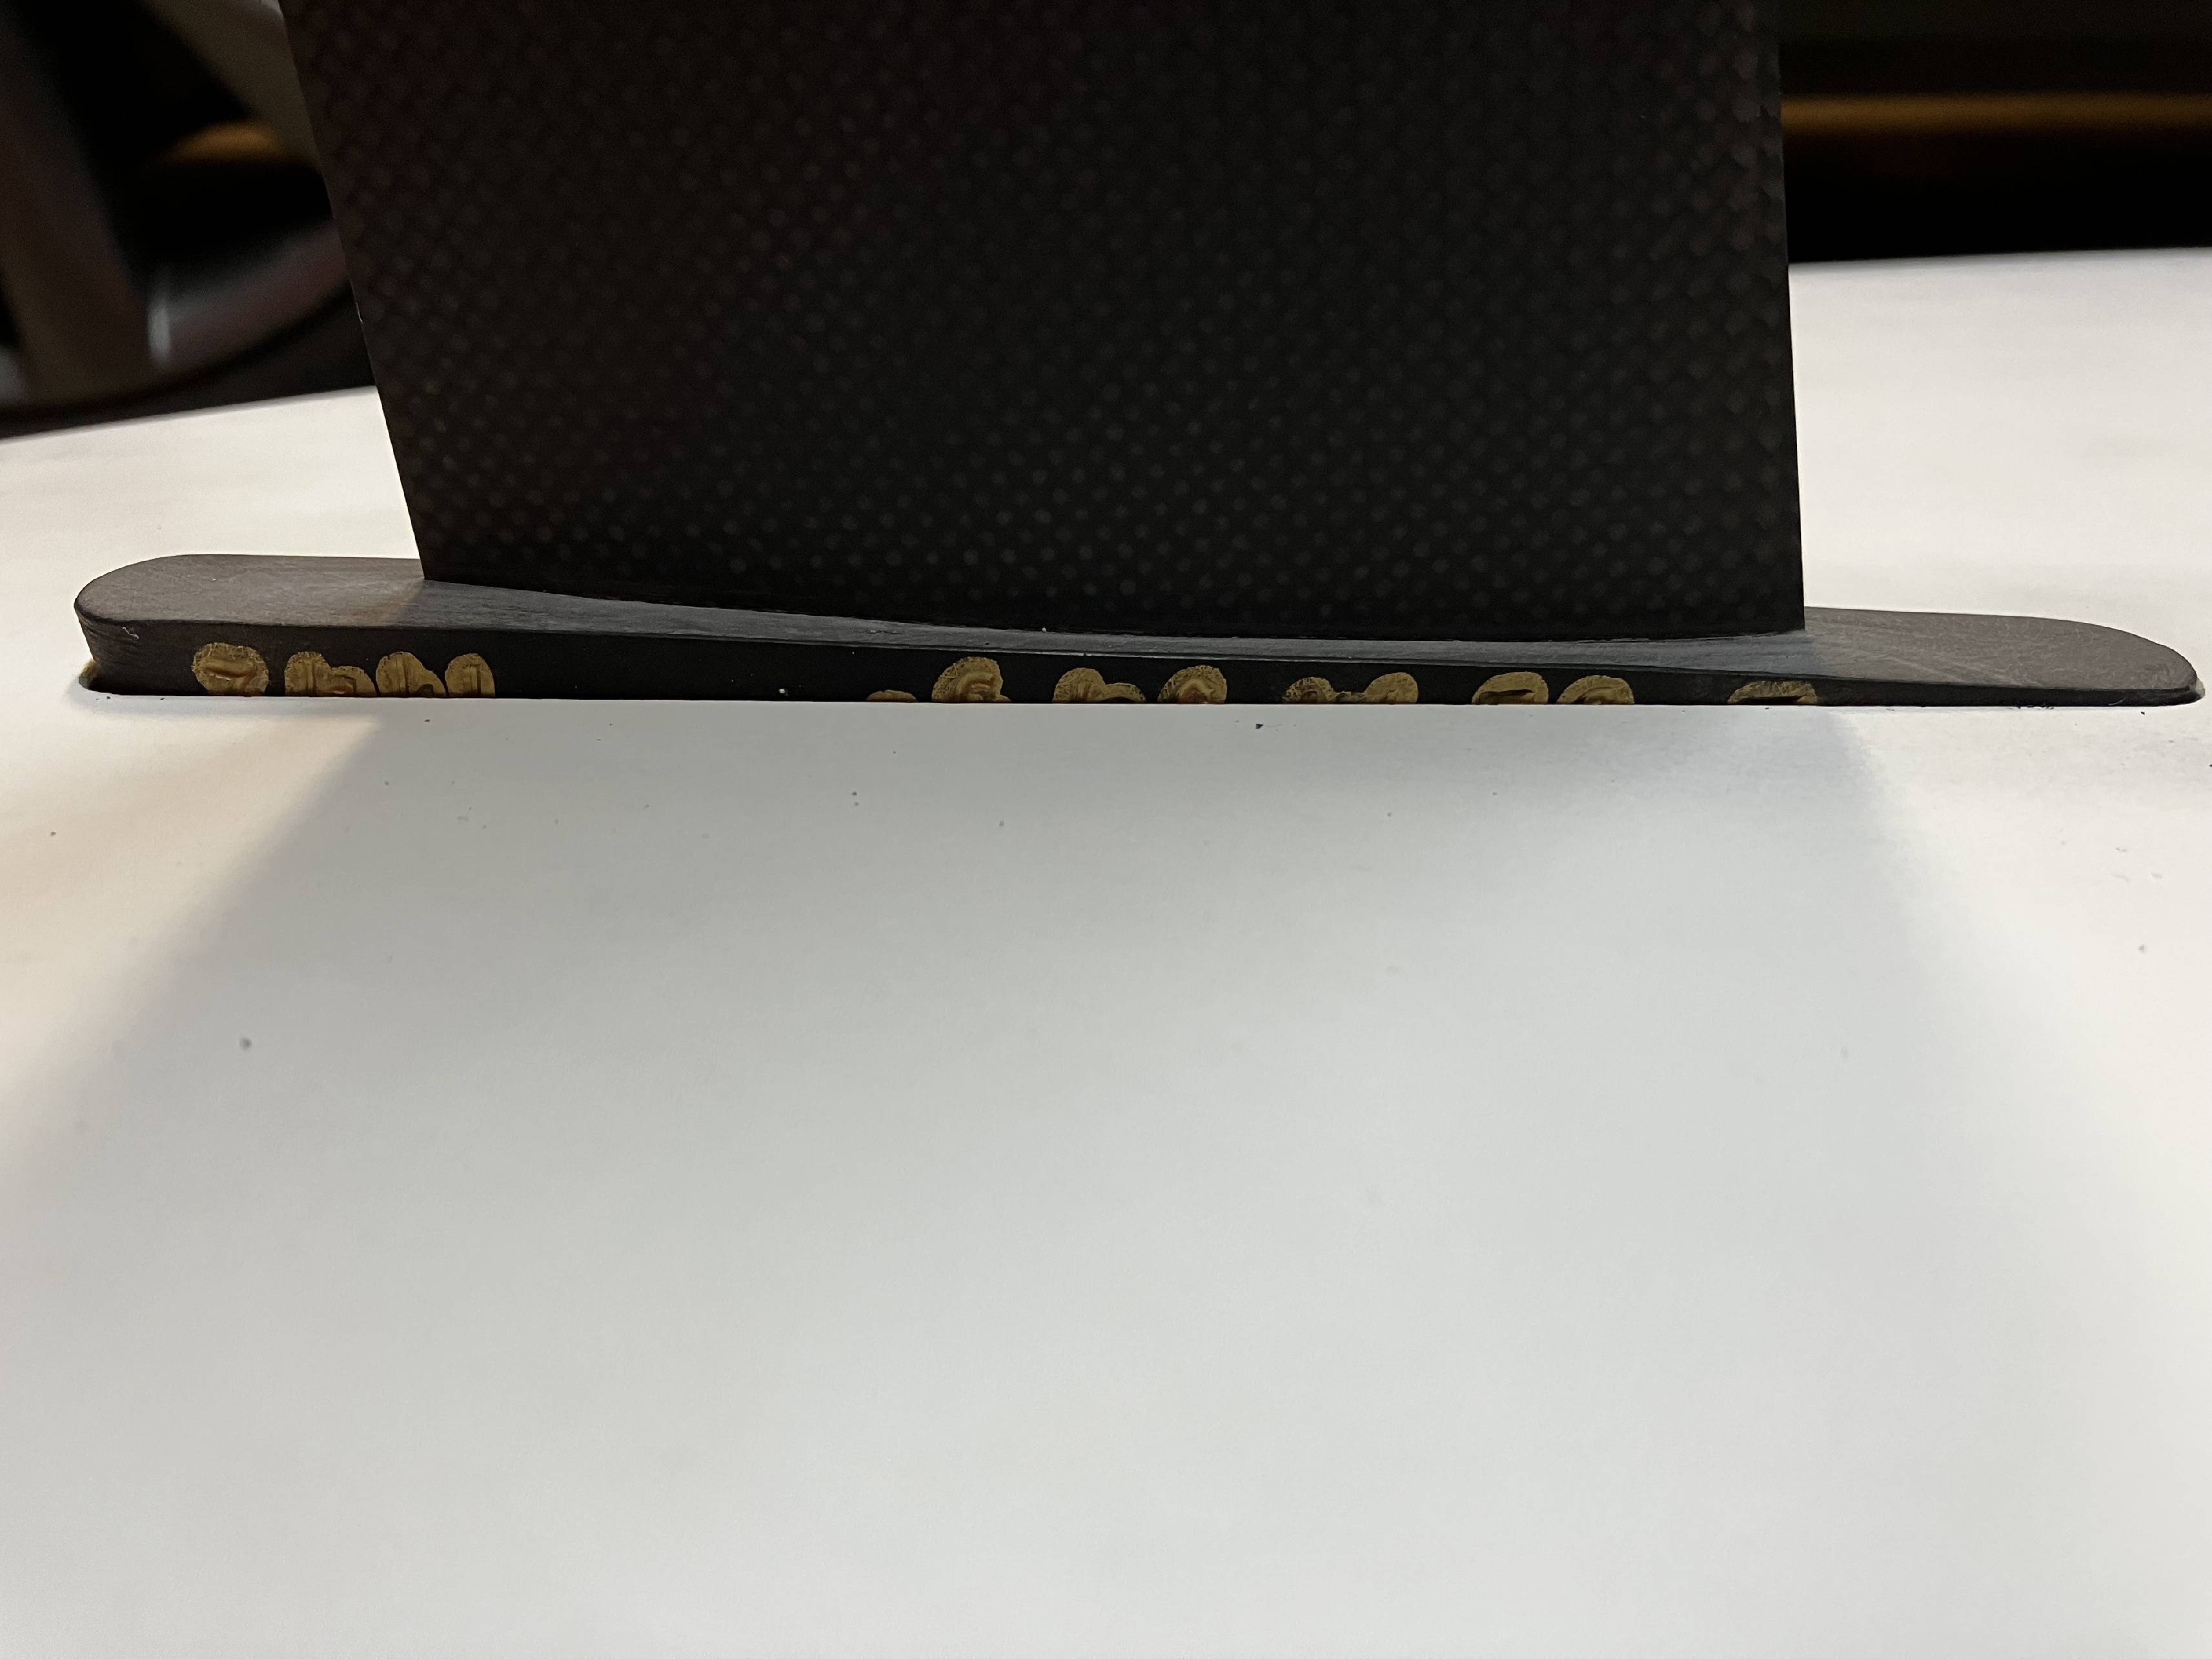
Trying to mate this Z fin with a Carbon Art. It’s a very tight fit and takes a fair bit of wiggling to get it to where it is in the pic. I can get the front of the tuttle head to sit flush with the board but not the rear. Have trawled through the subject on here and other forums. Am I correct in thinking that I just need to sand the front and rear surfaces for it to fit flush?

elmo
elmo
WA
8899 posts
WA, 8899 posts
4 Jul 2026 11:18am
Before sanding try to pull down with screws, set it so the base is level first unlike what you have in the photo.

If you just sand away, without pulling down with screws you may end up with the opposite scenario of the base sitting too low.

kuotadriver
kuotadriver
70 posts
70 posts
4 Jul 2026 11:23am
Ok thanks Elmo. How do I work out which area to sand once I’ve done that?
firiebob
firiebob
WA
3183 posts
WA, 3183 posts
4 Jul 2026 11:46am
I sand both ends a little, then as Elmo said fit it and tighten screws, if still proud repeat. If you keep sanding and hand fitting there's a chance you'll sand too much and the fin will be recessed when the screws are tightened.
Mark _australia
Mark _australia
WA
23746 posts
WA, 23746 posts
4 Jul 2026 12:06pm
Agree with last two. But always test if you can get it to sit with front flush or rear flush but never both. Then you know it’s just too long or deep but the tapers are correct

if it will only ever sit with one end flush but never the other no matter what you do it’s gonna be way harder.

so are you sure u can’t make it sit the other way?
jdfoils
jdfoils
468 posts
468 posts
4 Jul 2026 1:02pm
Rub the fin base with chalk and then install the fin. The area that make contact will transfer.chalk from the fin base to the box. Sand those areas until you achieve the level of fit you desire.
kuotadriver
kuotadriver
70 posts
70 posts
4 Jul 2026 5:11pm
Mark _australia said..
Agree with last two. But always test if you can get it to sit with front flush or rear flush but never both. Then you know it’s just too long or deep but the tapers are correct

if it will only ever sit with one end flush but never the other no matter what you do it’s gonna be way harder.

so are you sure u can’t make it sit the other way?


Both will sit flush but not at the same time. So it’s possibly too long.
Mark _australia
Mark _australia
WA
23746 posts
WA, 23746 posts
4 Jul 2026 7:06pm
Right then it’s easy. Sand front and rear tapers evenly with a block - no freehanding it.


but like others said do not test fit by hand it will need screws to pull it in
else you will be low when tightening it up
Meh
Meh
NSW
59 posts
Meh Meh
NSW, 59 posts
5 Jul 2026 12:51pm
I've sometimes wondered if there is an equivalent to Engineers Blue that might highlight the high spots. Maybe something like this...

rusticfarmhousecharm.com/products/stazon-refill-re-inker-mellow-mint-15ml-permanent-solvent-based
Mark _australia
Mark _australia
WA
23746 posts
WA, 23746 posts
5 Jul 2026 7:48pm
^^^ chalk was already suggested by jd. Crayon works too

but it won’t be high spots, it’s just oversized.
SurferKris
SurferKris
506 posts
506 posts
5 Jul 2026 10:33pm
Hard-soap works as a high spot indicator too, but that is more for the two sides and it is not usually needed for the two tapered ends.
Sometimes the black plastic of the fin-head is good enough as an indicator on its own. It gets matte/dull after sanding and then turns more shiny at high spots after a trial fitting in the board.
Gestalt
Gestalt
QLD
14997 posts
QLD, 14997 posts
6 Jul 2026 7:26am
SurferKris said..
Hard-soap works as a high spot indicator too, but that is more for the two sides and it is not usually needed for the two tapered ends.
Sometimes the black plastic of the fin-head is good enough as an indicator on its own. It gets matte/dull after sanding and then turns more shiny at high spots after a trial fitting in the board.


Agree. Just look for the marks on the fin base after fitting and that’s the spot the focus on.
kuotadriver
kuotadriver
70 posts
70 posts
6 Jul 2026 3:12pm
Cheers guys, fitting perfectly now. Needed sanding on both tapers but didn't need to touch the sides.
Imax1
Imax1
QLD
4955 posts
QLD, 4955 posts
8 Jul 2026 8:45am
First make sure the fin head is not too deep. Zooming in on the pic ,I notice the back end of the base is round with some file marks. It should be square with rounded corners. Has someone previously built up the head and badly fitted it into a oversized box ? I would start with filing the rounded point of the head to match the square profile of the box. Slowly , slowly, little by little using the screws.
kuotadriver
kuotadriver
70 posts
70 posts
9 Jul 2026 6:49am
Imax1 said..
First make sure the fin head is not too deep. Zooming in on the pic ,I notice the back end of the base is round with some file marks. It should be square with rounded corners. Has someone previously built up the head and badly fitted it into an oversized box ? I would start with filing the rounded point of the head to match the square profile of the box. Slowly , slowly, little by little using the screws.

That’s how it came from the factory


Please Register, or first...
Topics Subscribe Reply