Fatboy Lefroy

> 10 years ago
Reply
Register to post, see what you've read, and subscribe to topics.
gsand
gsand
19 posts
19 posts
5 Jun 2009 7:59pm
Hey All, this thread is just going to be a log of me building a Lefroy, The plan was to build 2 at a time but we'll see how this one sails first.

I am sticking to the plan as much as I can, but on the materials front I am using whatever I can get my hands on so we'll just see how it turns out.

And just so you can get back of the edge of your seat while reaching for your crowbar and trying to track me down, I dont have a lathe, mill, tig or any other fancy machinery just a shed and a open mind :)


Tools I work with are:

Cheapo chop saw - a mans best friend.


Big old 20-speed drill press with rotating table.


Lincoln MIG, I dont use gas though. (I wish i had gas to use!!!)


A incredibly messy and hazaradous workbench, home to the humble angle grinder with plenty of cutting discs (plus gods gift to metalworkers - flap discs. Huge old Dawn vice and a little china vice for extras.


And very importantly my angle finder.


A heads up, I'm no proffessional welder so lets see what I can cobble together
gsand
gsand
19 posts
19 posts
5 Jun 2009 8:06pm
First step is to build the rear axle/stub axles.

I varied the plan here by using 1000mm of 35mm, and then 250mm long 30mm axles.

Measured up the outer axles for the retaining bolts, wrapped them in some masking tape for a snug fit, slid them to their appropriate position and drilled through the whole lot.


Chop saw cuts for camber + welded up. -7.5 degrees camber


gsand
gsand
19 posts
19 posts
5 Jun 2009 8:16pm
Starting on the main beam.

I got hold of some 50mm nominal bore galv, in medium guage. It has a 3.6mm wall, which is almost double the wall as recommended in the plan. By the way, I'm building this yacht with 3.6mm wall tube [}:)]

I placed the beam in the vice making sure it was at 0 degrees. Make the notch in the rear end, Nice and square. Offer up the axle beam, check your alignment either side, and check the axle is square to the main beam or the camber will provoke toe in/out.

Weld her up carefully so all your hard measuring doesnt warp, sit back and give yourself a pat on the back


By carefull use of the angle finder, this whole project can be (well so far no problems!!!) be built in a good vice on a good bench (so long as it isnt wobbling all over the place!!!)
gsand
gsand
19 posts
19 posts
5 Jun 2009 8:35pm
Next up is the Mast tube. I know the plans call for 60x2, but my 3.6wall stuff is a snug fit for the mast (2pc carbon sailboard mast).

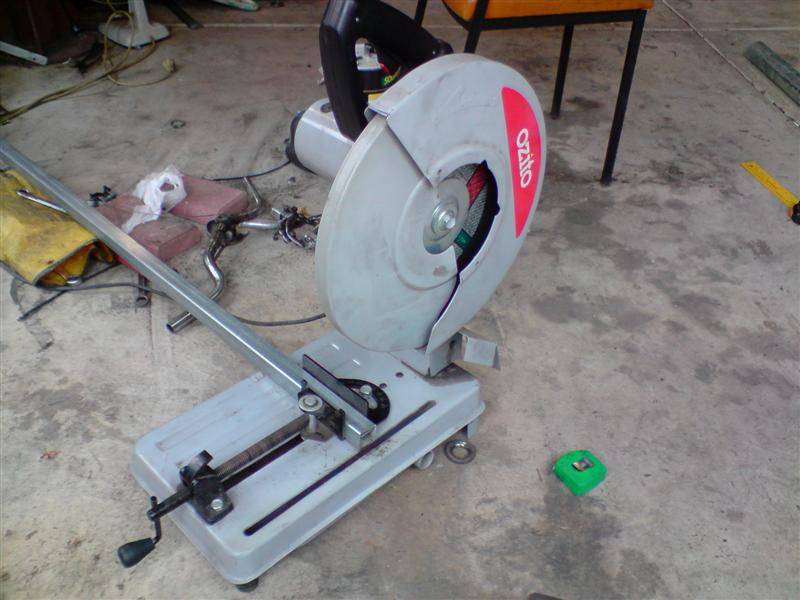
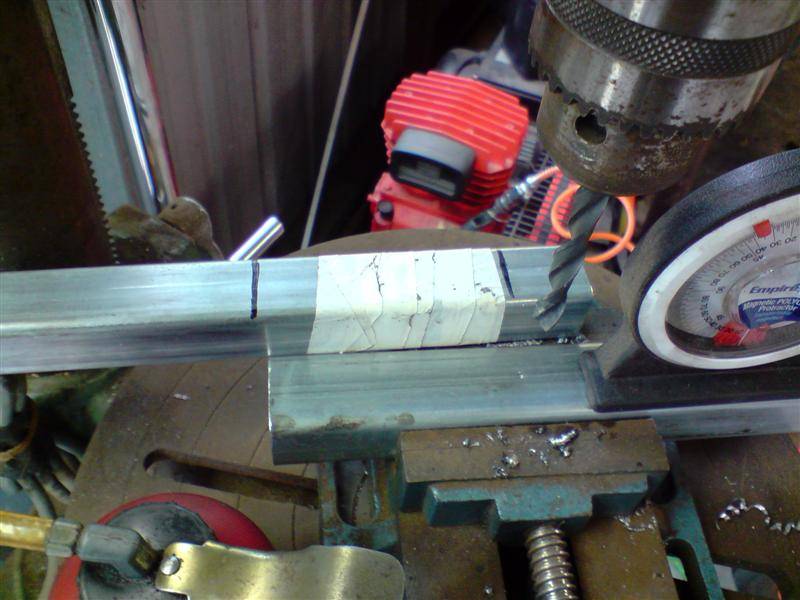
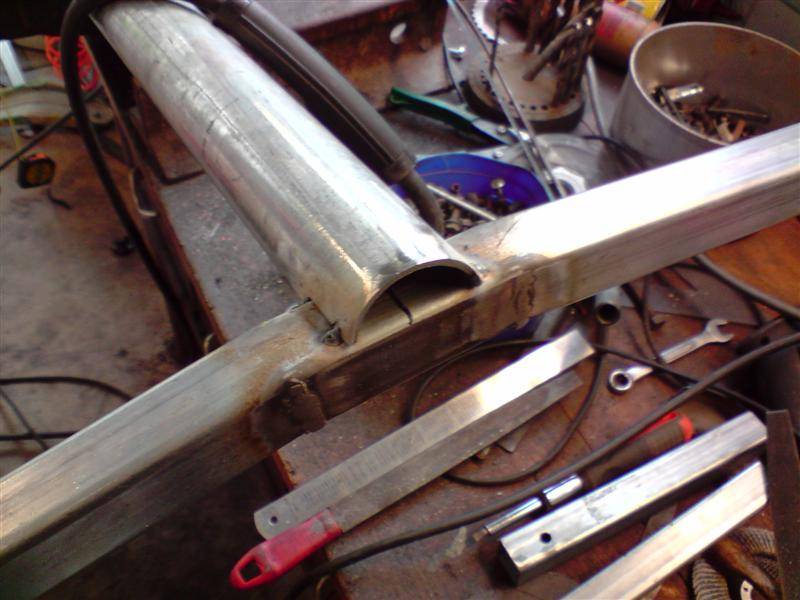
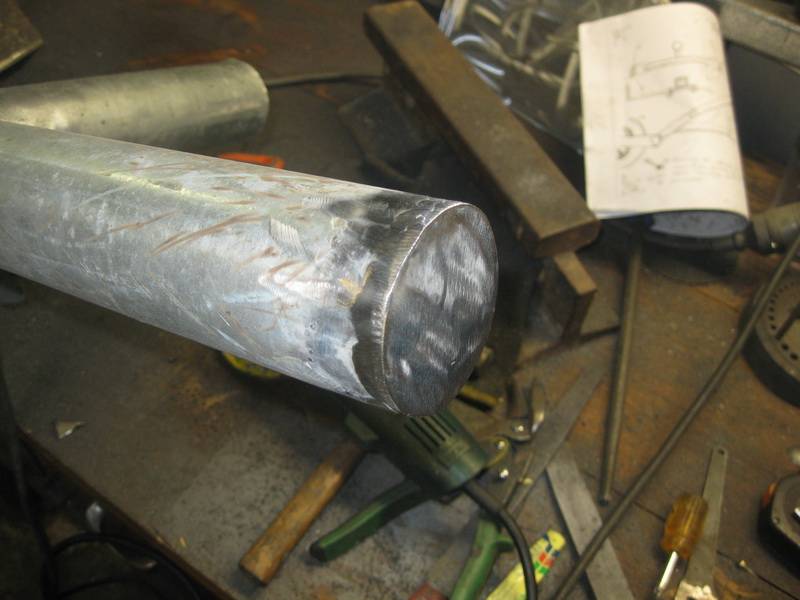
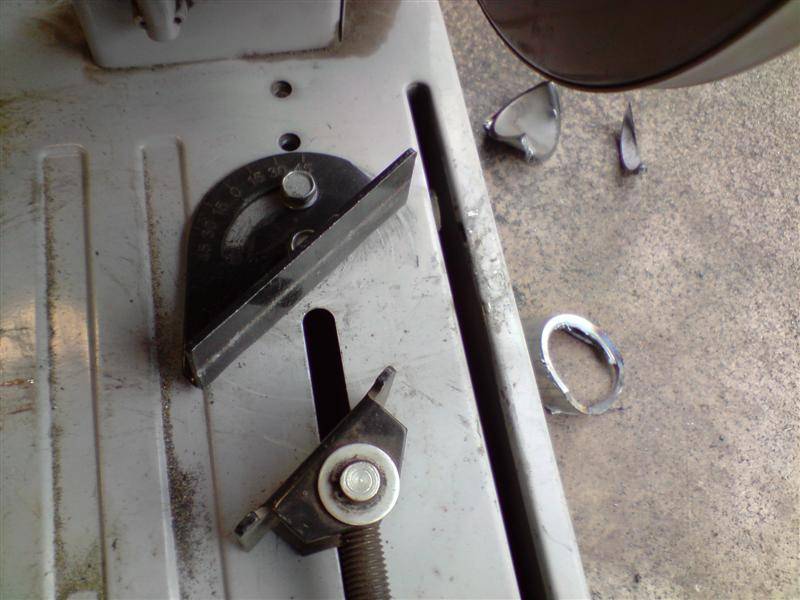
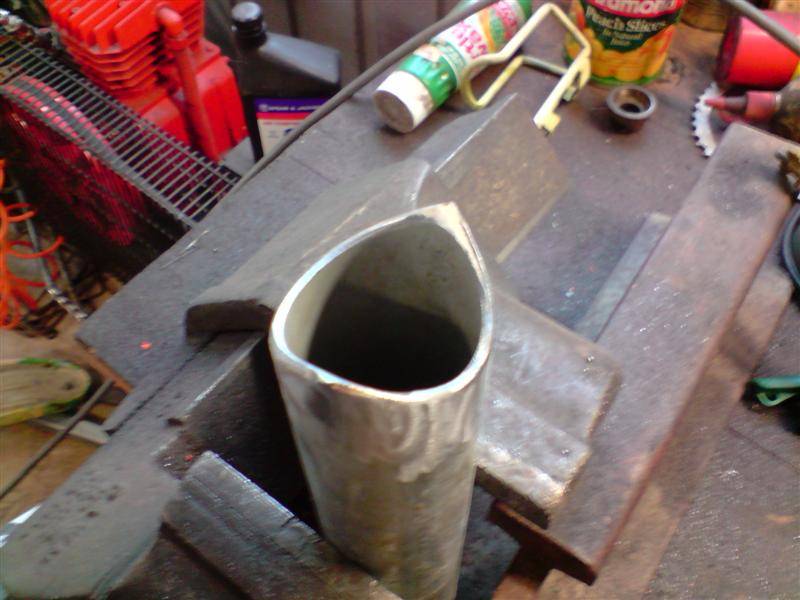
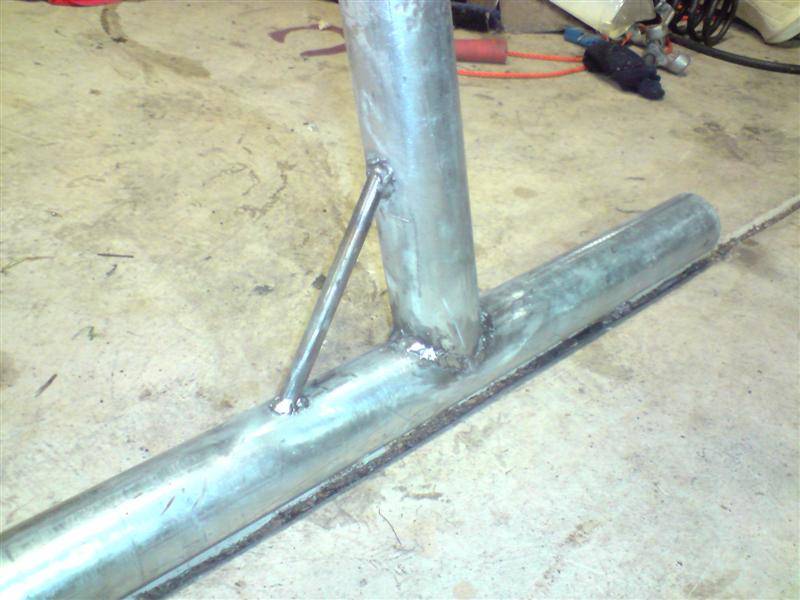
Fishmouth the end of the tube for fitting on the 60mm beam, measure + set the angles right and you'll do it properly first time time in the chop saw.

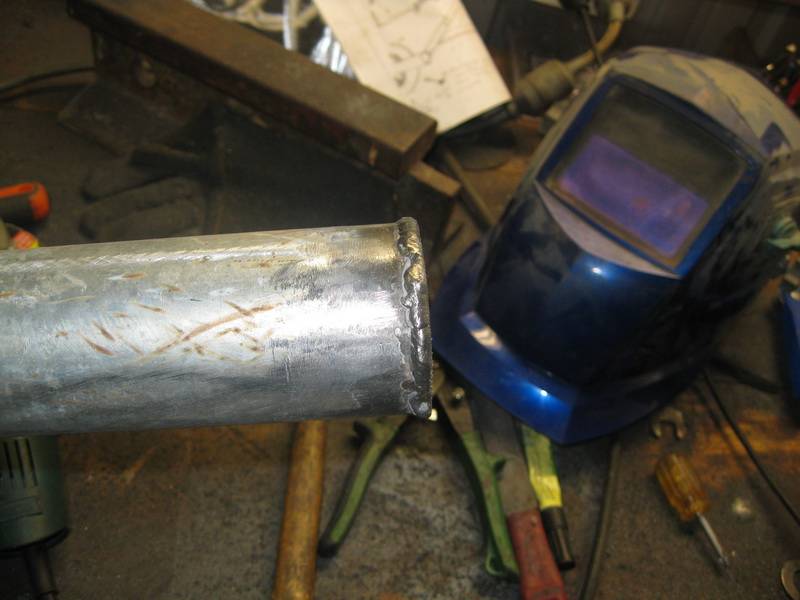
I set the saw to around 37 degrees, made the first cut. flip the pipe around and do the same cut but slightly offset, this will give you the mast rake. finish it off with the flap disc and file. Notching tube like this in a chopsaw can take a while to get the hang of - but once you've got it sorted out theres nothing stopping you from starting a roll cage business!!! (not recommend)
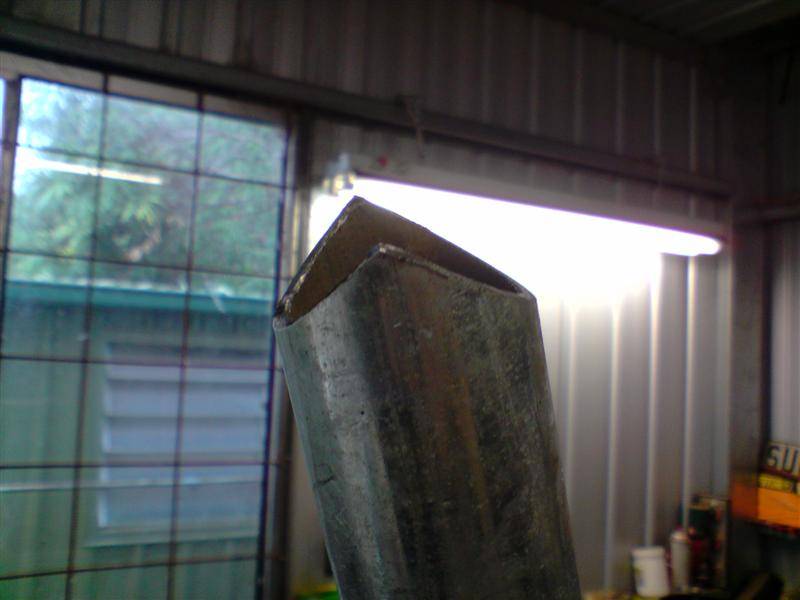
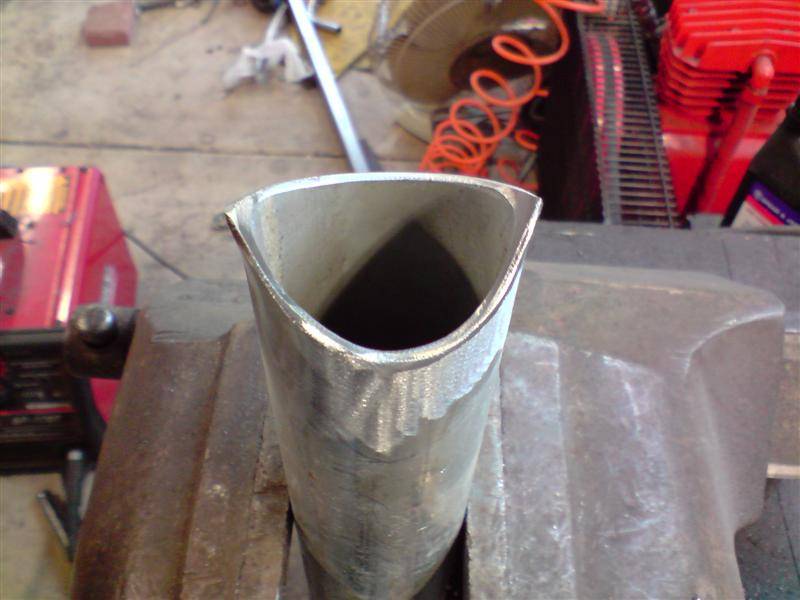
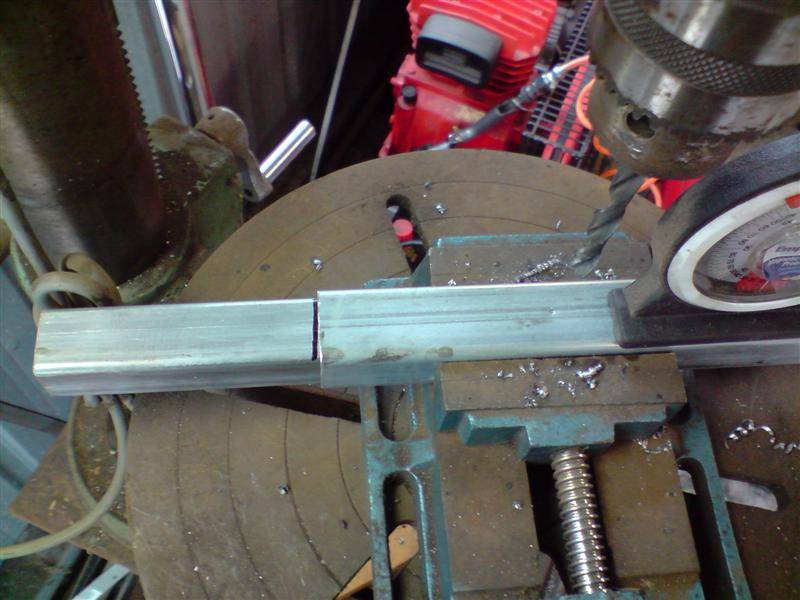
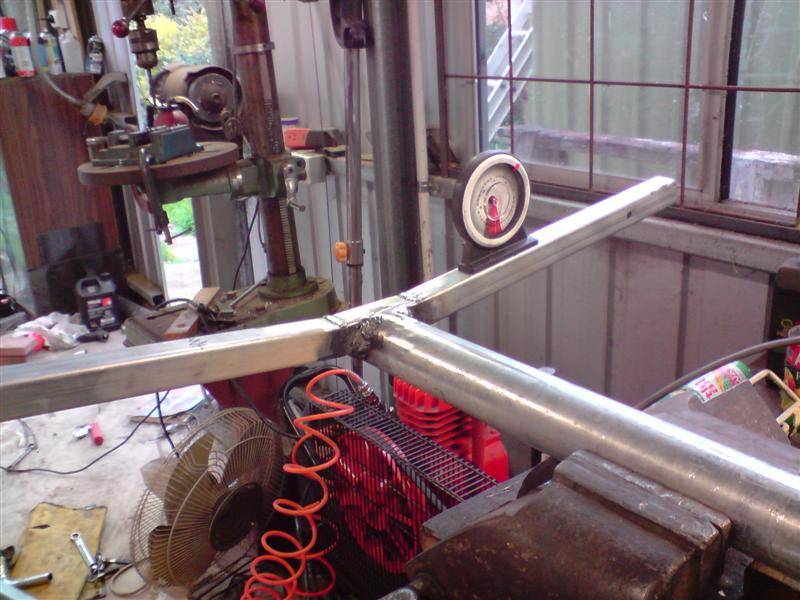
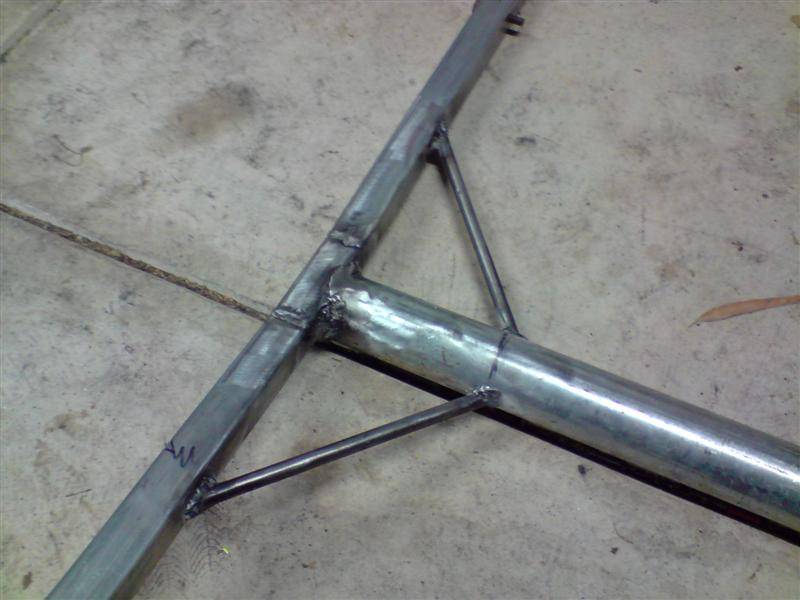


Perfect fit

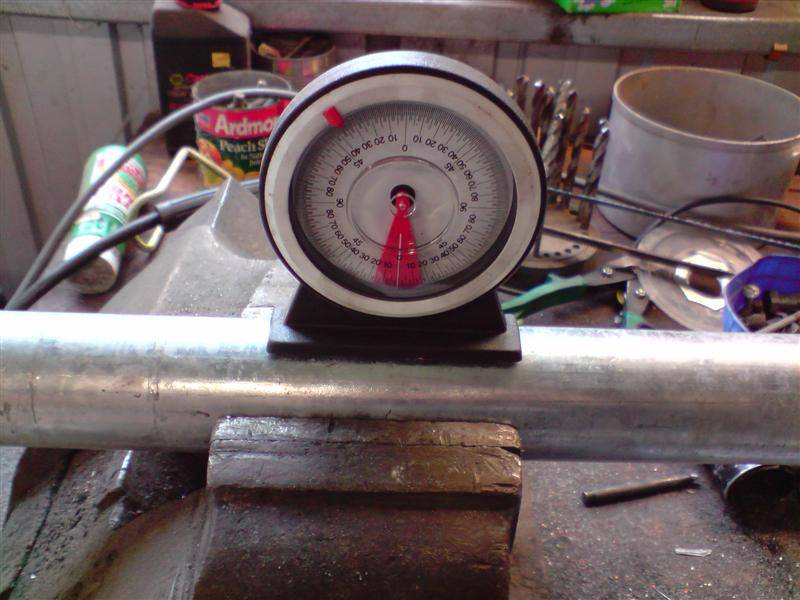
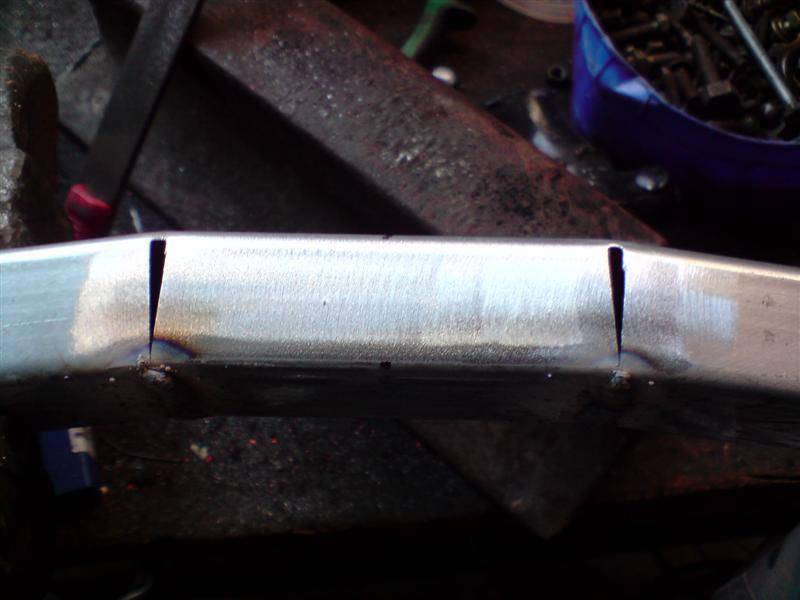
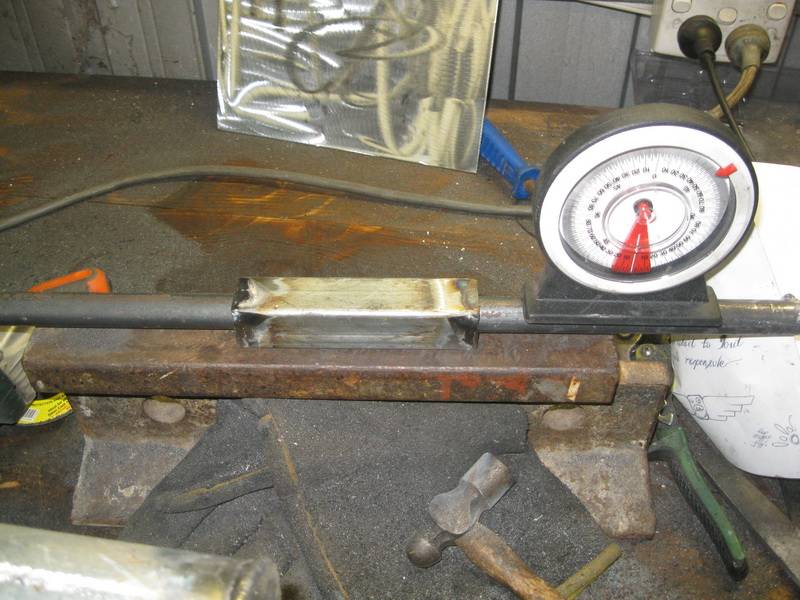
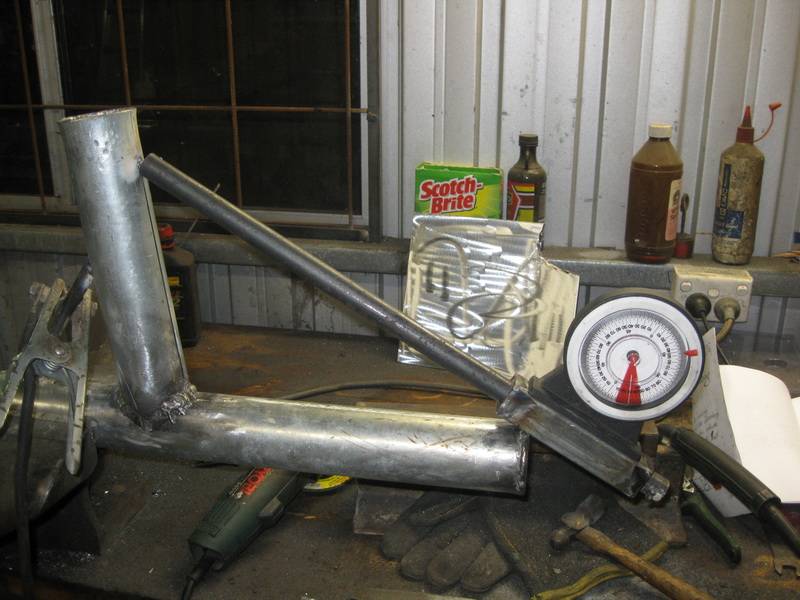
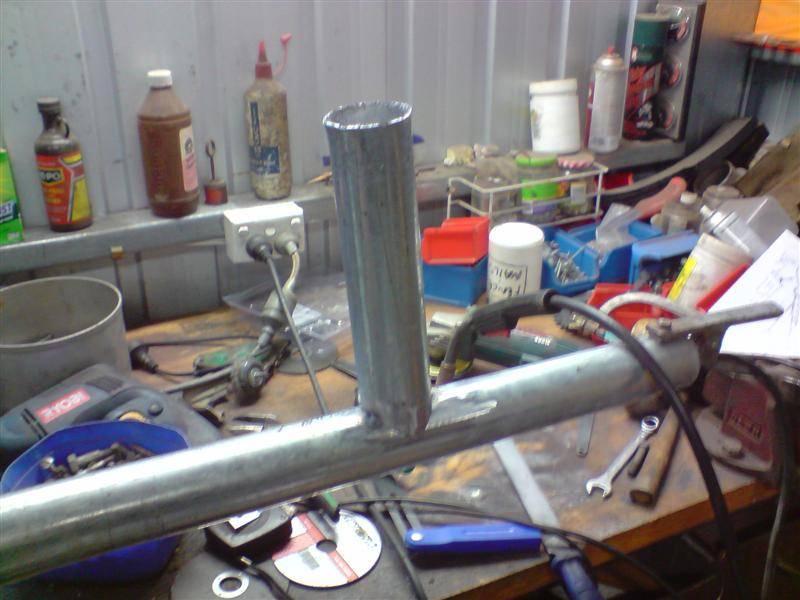
To get the mast angle true while in the vice, I simply tweaked the chassis around until the angle of both axles was equal (7.5 degrees) and tacked the tube on at a right angle, triple checking the guage


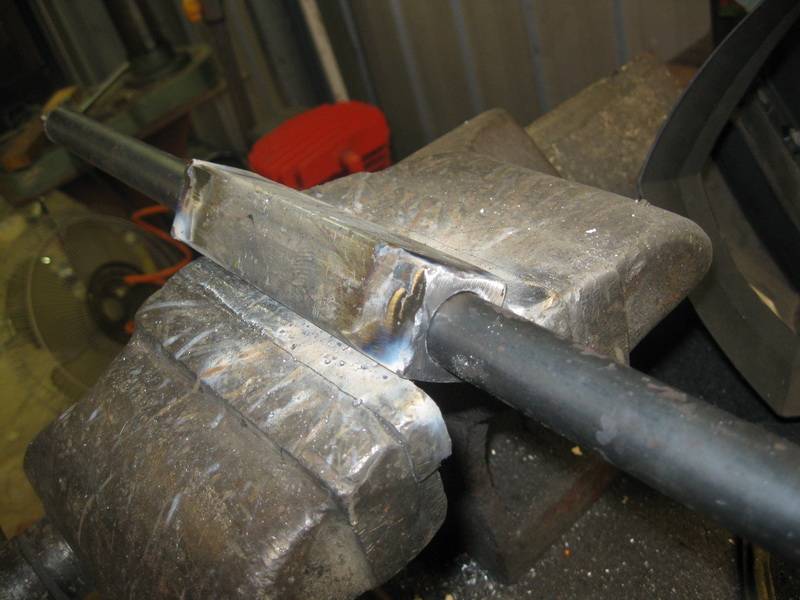
Add the solid brace and Weld it all up!! Sit back and potter around the shed with a proud grin. Also a good time now to "show off" your sloppy welds and workmanship to anyone else in the house who doesn't care the slightest


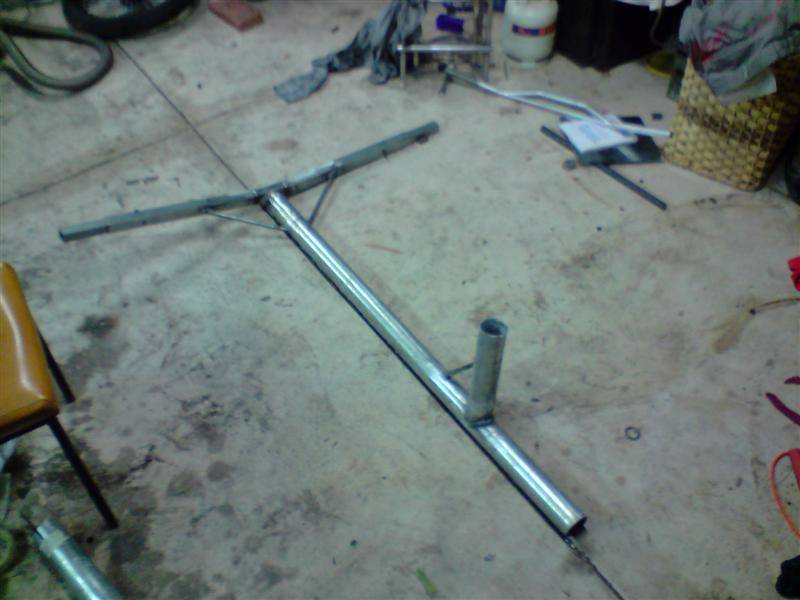
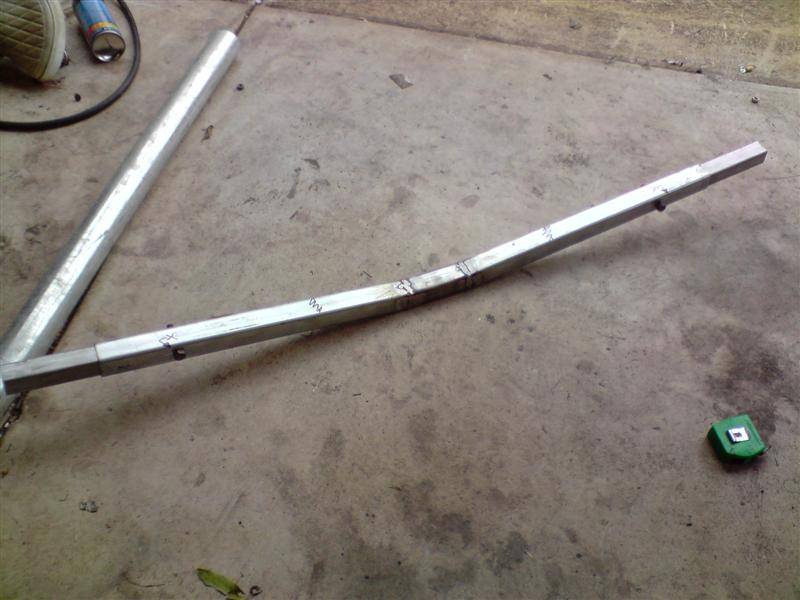
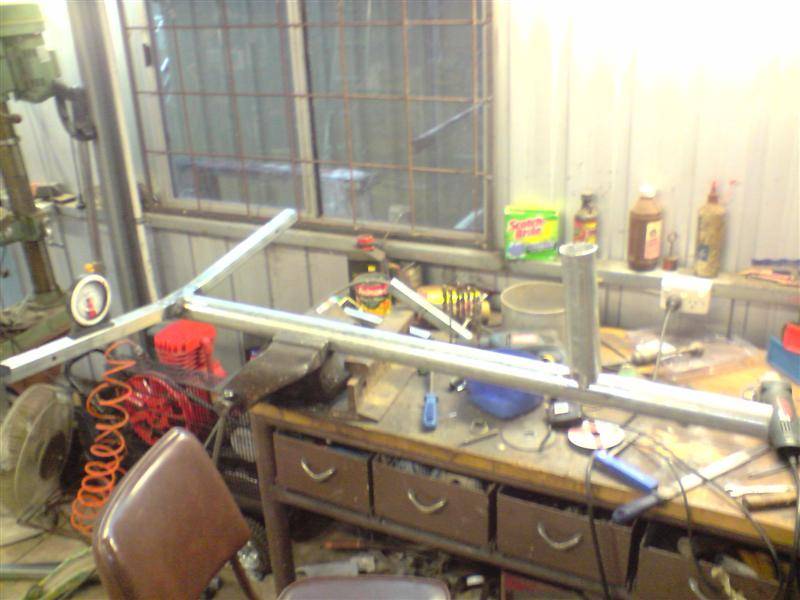
Thats it for today. Next up is the steering head, but cant make the fork until i get some Fallshaws for this darn thing!!!


Oh and by the way, for anyone interested in the weight using such thick walled steel, the frame as pictured is 11kg. I dont know how much a thinner frame would add up to, but I dont think its too bad. Besides, all the weight thats going to be piloting this machine along isnt going to make the slightest difference to the chassis weight.

at the end of the day its all ballast

Until next time :)
landyacht
landyacht
WA
5921 posts
WA, 5921 posts
5 Jun 2009 9:02pm
all a bit easy really isnt it
nebbian
nebbian
WA
6277 posts
WA, 6277 posts
5 Jun 2009 9:59pm
That's one impressive shed

Gotta get me one of those angle finders, thanks for the tip

Good job on the build btw, looks awesome!
cisco
cisco
QLD
12365 posts
QLD, 12365 posts
6 Jun 2009 12:08am
Going great there gsand. The extra wieght in the 3.6mm spine tube will just have to be saved elsewhere. A suggestion is to save it in the seat by using 4mm ply for all of the seat (base, front, back and sides) and the stitch and glue construction method.
Your workshop is great as are your photos. Please keep us posted. Cheers Cisco
gsand
gsand
19 posts
19 posts
5 Jun 2009 10:42pm
Thanks for the positive feedback guys.

Cant take much credit for the shed, although alot of the stuff in it is my own - its my folks shed


Angle finder is something everybody should have - I got mine at flintware, just make sure you buy a quality one, not a cheapo thing (the one you see is about $40). A trap for young players is getting steel dust on the magnets which always happens whenever you arnt using the darn thing, it will make it uneven very quickly!!


http://www.empirelevel.com/squares/protractors/
gsand
gsand
19 posts
19 posts
5 Jun 2009 10:47pm
Another thing, Are there any generous sould in S.A. with a mould for a fiberglass lefroy seat??


Kody
Kody
QLD
190 posts
QLD, 190 posts
6 Jun 2009 1:07am
Hi gsand,
I have a small question to ask. What angle of rake did you set the mast tube? I understand a 10 degree rake angle is required but your mast tube looks like it's vertical. Have you changed the angle or is the ten degrees not showing in the photos?
You're going great with the building, what will you use for the wheels?

Kody
gsand
gsand
19 posts
19 posts
5 Jun 2009 11:17pm
Guilty, I think the rake came out to about 7 or 8 Degrees. It does however look vertical in the pics.

Its welded now I'll see how it sails, I can always do a trick fork to pitch the chassis back if its required.


Given this is built from mostly scrap, this boat really is a functional experiment. The next will be given more $ in getting the proper materials and make a lightweight frame.

Kody, I will be using the typical fallshaws for the rear, but I would like to use the fallshaw 5 spoke Pizza Cutter 12" on the front. At least the wheels can be carried over to the next generation. After I do the steering neck, I'm stuck for a while until I come across some more money, so the wheels, and therefore Fork will be waiting a little while.


On Seats, I've a pair of fiberglass fixed race seats in my shed, would be interesting to see if they can be cut/extended/modified for a laydown style deal.
Kemosabi
Kemosabi
69 posts
69 posts
6 Jun 2009 3:32am
Nice build gsand.

I know what you mean about showing off your welding to un-interested people. My wife is a professional now at nodding in approval with a confused look on her face! She's very supportive, but just can't understand how melting metal can make me so happy.

Keep up the good work.
hills
hills
SA
1622 posts
SA, 1622 posts
6 Jun 2009 6:18am
Great job Gsand!!

Unfortunately there is no mould for the LL mini in SA that I know of. I assume Paul would have one in WA and Ian has built a beauty in QLD, but they are the only two I know of.

Faze5 has a moulded seat here in SA that Paul made. You could ask him if you could make a plug from it.

Check out Ian's build thread as he built his own seat mould and has also made a good fibreglass covered foam seat.
Hiko
Hiko
1229 posts
1229 posts
6 Jun 2009 7:20am
Wow, very impressive Great stuff !!!!
Love those heavy duty angle vices too
iand
iand
QLD
243 posts
QLD, 243 posts
6 Jun 2009 12:41pm
For a "one of" I'd suggest a stitch and tape ply seat (cheap) or a foam sandwich construction (you'll get whatever shape you wish)
If you can get one made off a mould just to give an idea of cost
gel coat-1 litre-$24.50
flowcoat-1 litre-$24.50
unwaxed resin-4 litre-$47.50
catalyst-100 ml-$6.29
Approx double if you want epoxy resin and I'm not sure about vinylester resin
acetone-1 litre-$15.40
cloth-$4.90 to $109.00+ per sq metre (min 4 sq metre is a guess, check with Landyacht)
couple of brushes etc.
PS if you paint the seat you could do away with the flow coat
landyacht
landyacht
WA
5921 posts
WA, 5921 posts
6 Jun 2009 7:16pm
Faze 5 has got a lot on at the moment , but I will discuss the seat thing with him, perhaps , all you SA home builders could get yourselves organized to do a weekend workshop on mould making and seat making where Faze 5 gives you the lesson and then you guys go and do it yourselves in future.
Learning the art would be a worthwhile experience. but kep in mind faze 5 has got a lot on.if you got enough people together who agreed on every thing , it wouldnt be too expensive , and you could produce seats for future mini builders. Keep in mind that I wouldnt approve of the mould being used commercially.
I shall discuss it with the master
gsand
gsand
19 posts
19 posts
6 Jun 2009 9:04pm
We'll Im not getting too hung up on the seating arrangement - will cross that path when I get to it ( god knows!!!)

Got some more work done today and then i blissfully ran out of welding wire.....

Anyway this is tonights progress from a rather chilly shed.

Steering head, 35x35 with some 3/4 washers filed out to fit 20mm steering shaft.


All runs true


3mm plate welded and ground


Then run another bead over it


Then onto positioning the steering head. I have a very simple way of doing it, but slightly difficult with no welder.

Here the neck is set at 30 degrees with the shaft tack welded onto the mast tube.
After this, the neck just has to be held in place, chassis rotated 90 degrees, and set the beam and neck to 0 degrees then welded up. Cut the side plates to fit afterwards by filing a bit here, grinding a bit there. Much easier than cutting a tricky bit of triangular 3mm sheet exacty 60 degrees.


Gizmo
Gizmo
SA
2865 posts
SA, 2865 posts
20 Jun 2009 1:01pm
Any further progress on the yachts?
Please Register, or first...
Topics Subscribe Reply