Building a Landyacht for DesignandTech Major Work

> 10 years ago
Reply
Register to post, see what you've read, and subscribe to topics.
Cameronc
Cameronc
NSW
78 posts
NSW, 78 posts
2 Jul 2009 5:11pm
what this is all so confusing why dont you just have a plate on welded onto the frame and bolt the fibreglass seat onto that....
kiwi307
kiwi307
488 posts
488 posts
3 Jul 2009 5:55pm
Cameronc said...

what this is all so confusing why dont you just have a plate on welded onto the frame and bolt the fibreglass seat onto that....


Hi Cameron, if you go back to the beginning, you will see that a number of people suggested that you should do what you think is right. There are absolutely no right answers in this sport, lots of people have tried things and learned, you should do this too.
In regard your question, no reason at all, it's a good solution, just maybe others did not have that material lying around, or because they copied others without thinking.
Now here is what I find close on exciting, you are thinking for yourself, rrather than copying others without thinking. This is potentially progress. Well done, keep stretching your mind.
Cameronc
Cameronc
NSW
78 posts
NSW, 78 posts
6 Jul 2009 10:08am
thanks kiwi thats what im trying to do , i have about 2 months left to have it finished i hope i have it done
kiwi307
kiwi307
488 posts
488 posts
6 Jul 2009 9:46am
For what it's worth Cameron, I made a front fork on Saturday in just over 25 minutes and the guts of the frame in 45 minutes, I am using an old seat I had lying round from an old lotus race car = 0 time.
Stubs all done in 15, so 2 months should be mountains of time.

All the above except the stubs was hand tools, ie NO power tools.
Cameronc
Cameronc
NSW
78 posts
NSW, 78 posts
29 Jul 2009 11:06am
just telling you where im at

put first layer of glass on my foam seat
bought 3 wheels
ordered metal


all i need is to put another layer of glass on seat and get new bearing and then weld all the frame up
hills
hills
SA
1622 posts
SA, 1622 posts
29 Jul 2009 8:16pm
Great progress!! Got any pics??
Cameronc
Cameronc
NSW
78 posts
NSW, 78 posts
6 Aug 2009 5:38pm
pictures are in separate thread let me know what you think in this thread
landyacht
landyacht
WA
5921 posts
WA, 5921 posts
7 Aug 2009 9:54am
probably too late now, but do you have or use a roller for working your glass and resin?.
please use gloves , even for sanding, a glass splinter can take years to come out of your skin
Cameronc
Cameronc
NSW
78 posts
NSW, 78 posts
7 Aug 2009 6:18pm
yes i used a metal fibreglass roller to get all the air bubbles out ( didnt get all of them out ) and i wear gloves and a facemask
Cameronc
Cameronc
NSW
78 posts
NSW, 78 posts
11 Aug 2009 5:37pm
Just bought the metal all i need now to buy is pedal assembly and axels ( have to get bearings and bushes for wheels and bushes for steering head yet ) just buying rope and pulleys what length of rope will i need and what thickness i have seen some 4.5mm rope and with pulleys and recommendations?
Cameronc
Cameronc
NSW
78 posts
NSW, 78 posts
12 Aug 2009 11:15am
another few things

with the mast step what angle does that go back at?

could someone write me a materials list for the pedal assembly i dont no if i was to do removable or not i think not just because of saving time and it would be alot easier just to make it non removable becuase once you take the front wheel off it wont take up much space anyway. With the axel extensions that go on the rear X member how are they fixed to the x member just by bolts? any preferences in types of metal for the axels and lengths?

Another couple of things is how do you cut the mast step so it fits on the spine properly?

also pulleys and rope and what to do for the boom?
sn
sn
WA
2775 posts
sn sn
WA, 2775 posts
13 Aug 2009 12:05pm
Hi Cameron,
I hope this helps-

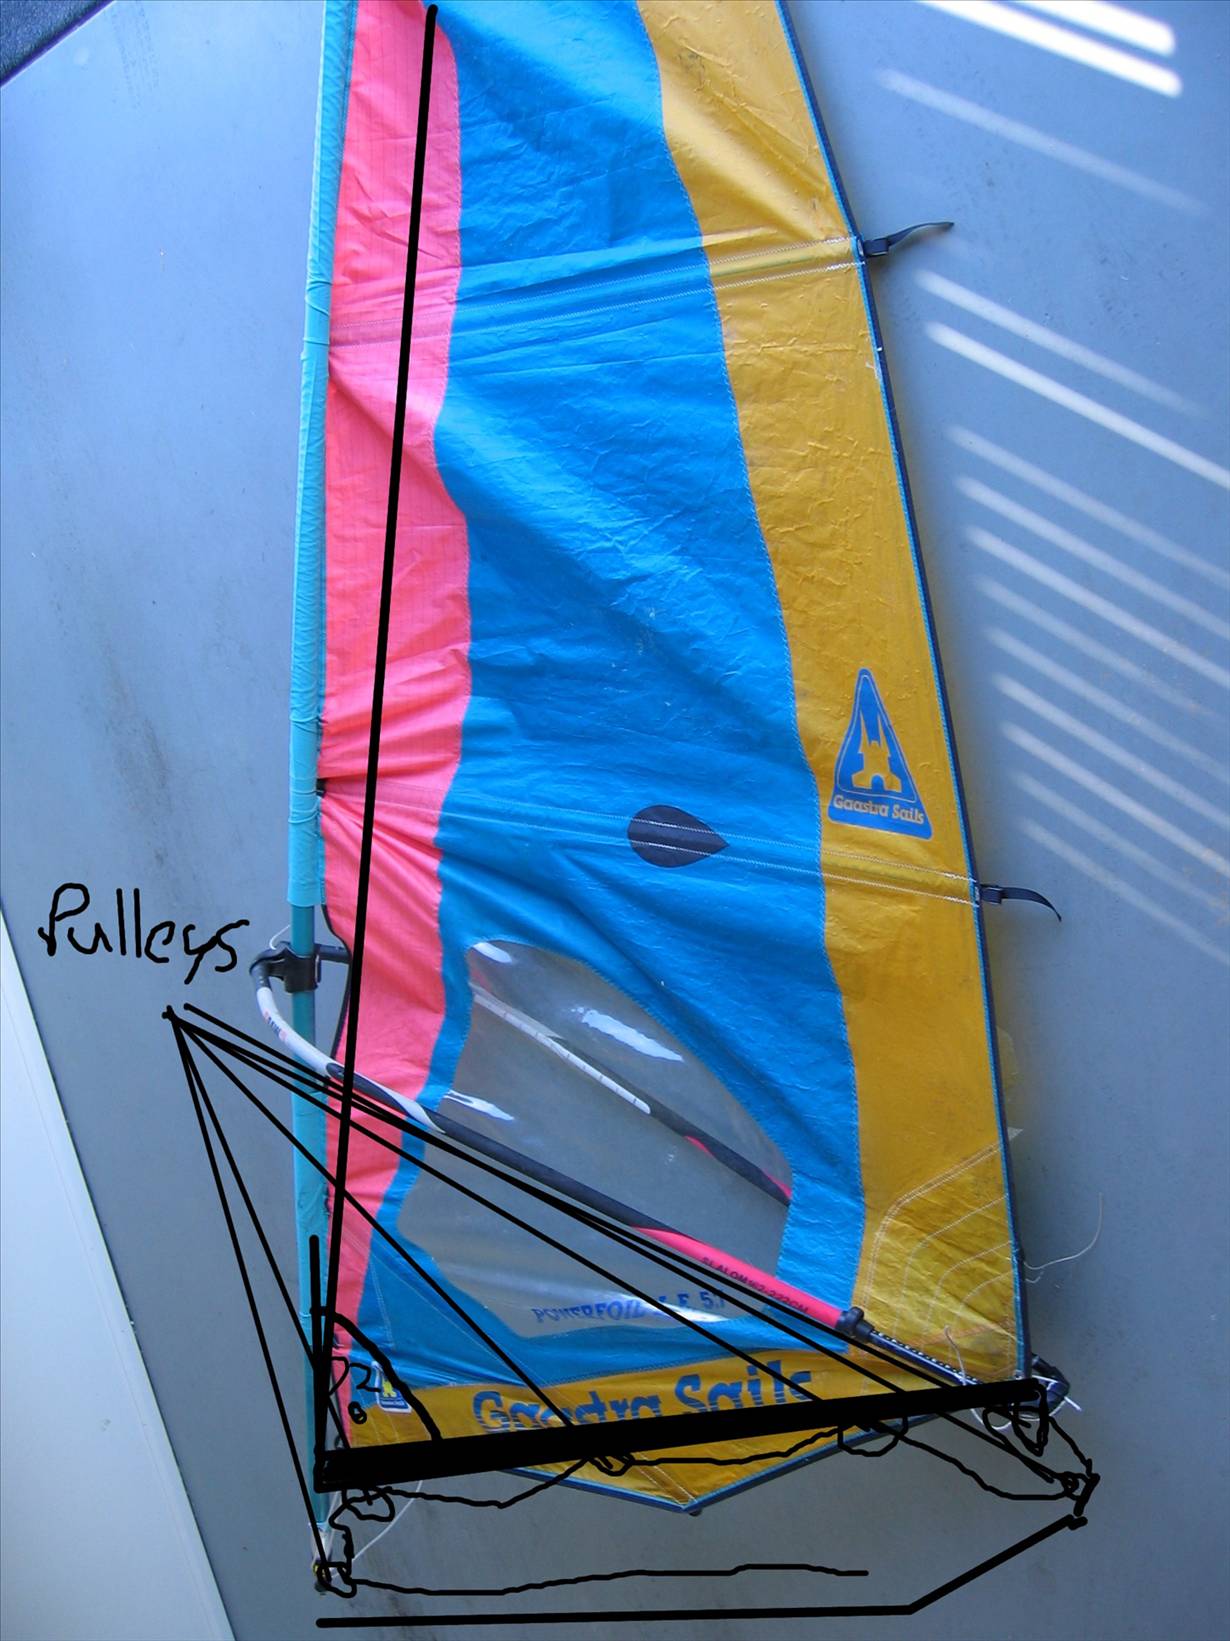
rope needs to be about 10mm, locally (in W.A) Bunnings are selling reasonable 30m rolls of suitable rope for around $10.00, which is more than enough for your sheeting rope, you will need a few meters of 5mm to tie your sail to the mast step, the mast and the boom.

The rope from bunnings is sold under the name of -
"GRUNT" multi-purpose rope, 9mm x 30meters.
part/ item number GROOO3 made in china (of course)
distributed by Homewares PTY LTD
P.O. Box 8113, Northland Preston,
VIC, 3072
www.useGRUNT.com

my pulleys were either old ones scrounged from my shed, or taken from an old rowing machine- not ideal, but they were free...
-----------------------------------------------
DIFFERENT TYPES OF STEERING BUSHES
Bushes for your steering will depend on what size steering shaft you are using.

bushes can be bought from the following company (they might have a branch in your area)
This is where you buy FALLSHAW wheels, bushes and wheel bearing adaptors from in W.A.

"EASYROLL MATERIALS HANDLING"
Unit 4 18 Kewdale road, Welshpool, W.A. 6106
PH- 08 6462 9300
FAX-08 6462 9399
EMAIL- [email protected]

Bush part numbers are-SPBSH10-20, and SPBH10-34, at a cost of $2.85 each (you need 2 bushes.
unfortunatly I dont know which number is for which bush.
Bush sizes are as follows
(NOTE- these 2 bushes have a "step" on the outside which gives them 2 usable outside diameters)

grey bush- inside diameter-19.1mm
outside dia.- 31.25mm and 35mm
length- 24.5mm

black bush- inside dia.-20.5mm
outside dia.-31.5 and 35.25mm
length-24.5mm

both these bushes are a "tap-in" fit to common exhaust tube with the following dimensions- inside dia.-35mm approx.
outside dia-38.2mm approx.
wall thickness 1.6mm approx. (you need about 130mm of this tube)

---------------------------------------------------------------
If you expect to be going over rough ground you might be better off using the following bushes and steel tube as they are lots stronger and the urethane bushes will soak up some of the vibration.

These bushes are probably available from your local 4wd accessories shop, or car parts shop like AUTO ONE, REPCO etc
dont forget that you will need 2 bushes of the appropriate size to suit your steering shaft.

"TERRAIN TAMER" landcruiser leaf spring bush, part number 90389-14056P

inside dia.-20.1mm
outside dia.-40.22mm
length- 43mm

"TERRAIN TAMER" landcruiser leaf spring bush, part number-90385-18021P

inside dia-18.4mm
outside dia-40.1mm
length-43mm

steel tube- (you need about 130mm)
inside dia-40mm approx
outside dia-48mm approx
wall thickness- 4mm approx.

------------------------------------------------------------------
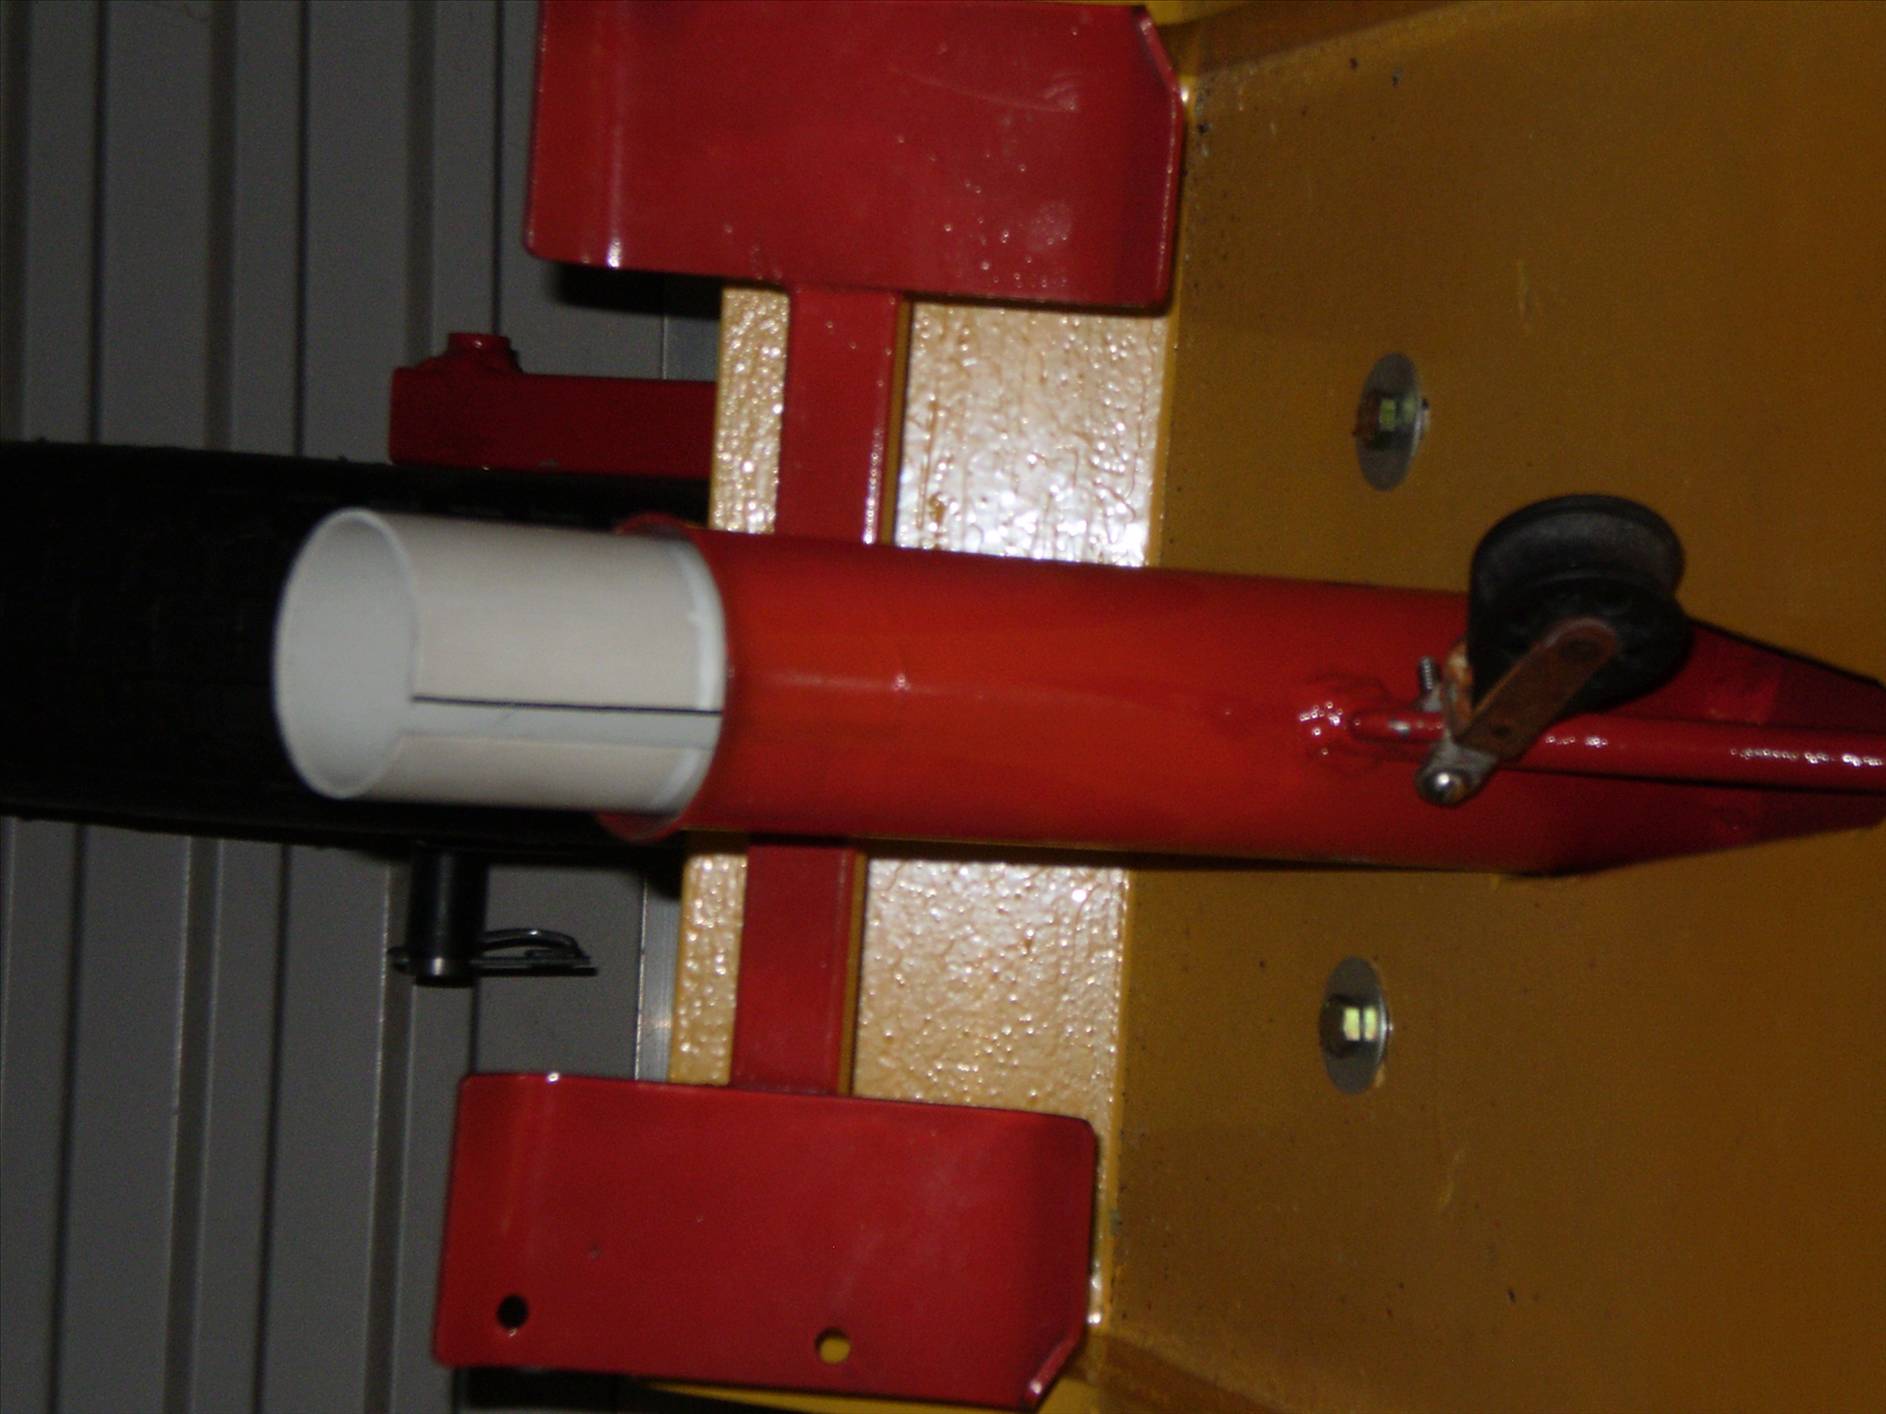
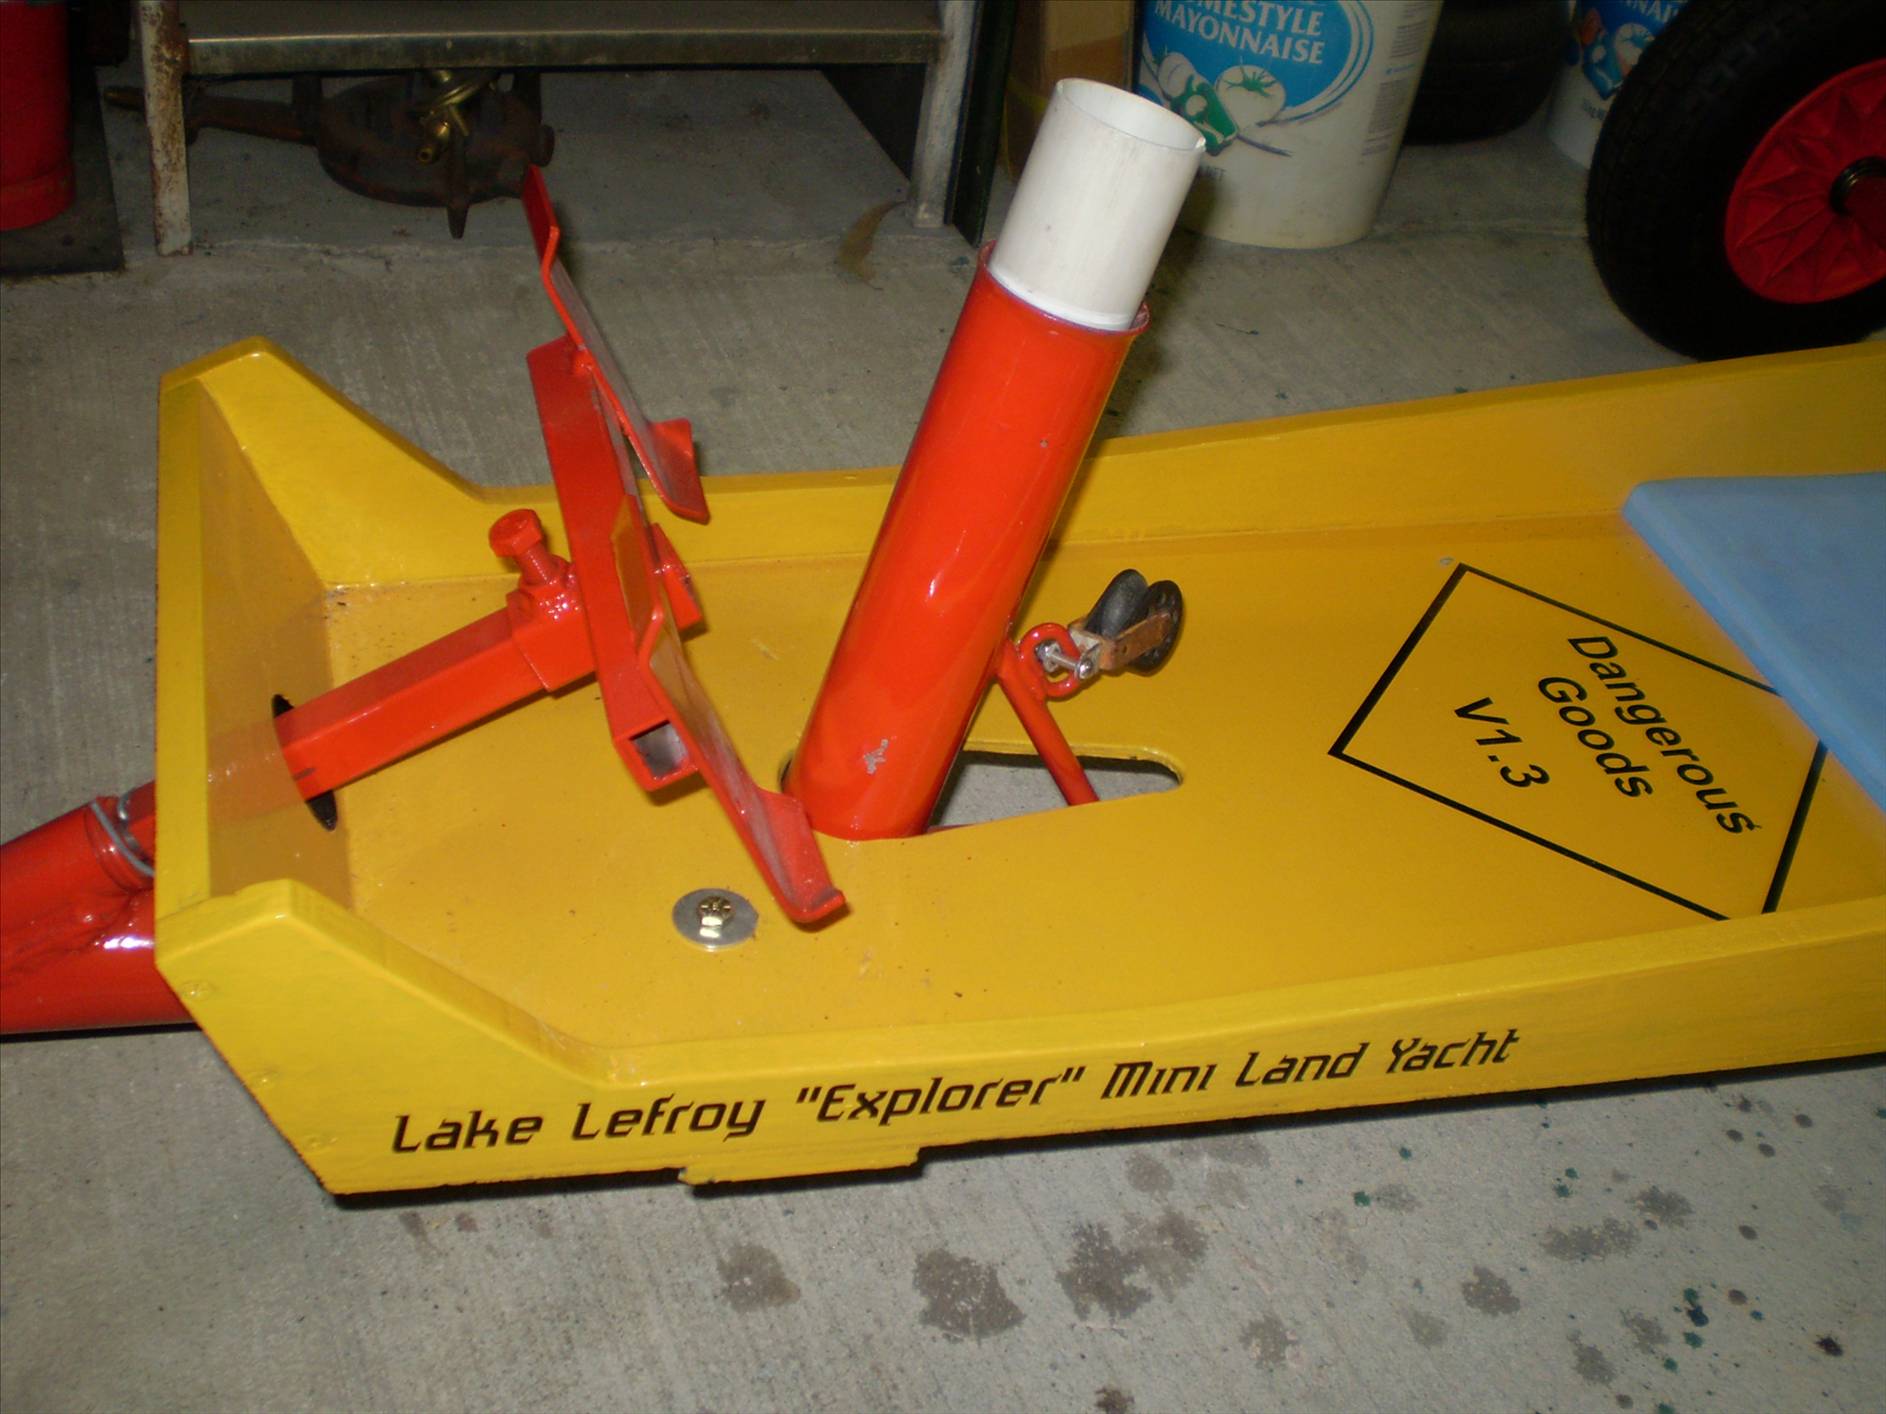
steel for your pedal assembly will depend on the outside diameter of your steering shaft,
you will need a piece of either round or square tube which slides over the steering shaft, and it is secured to the shaft with a bolt which passes through both the pedal assembly tube and steering shaft (which passes through the 2 nylon or plastic bushes.)

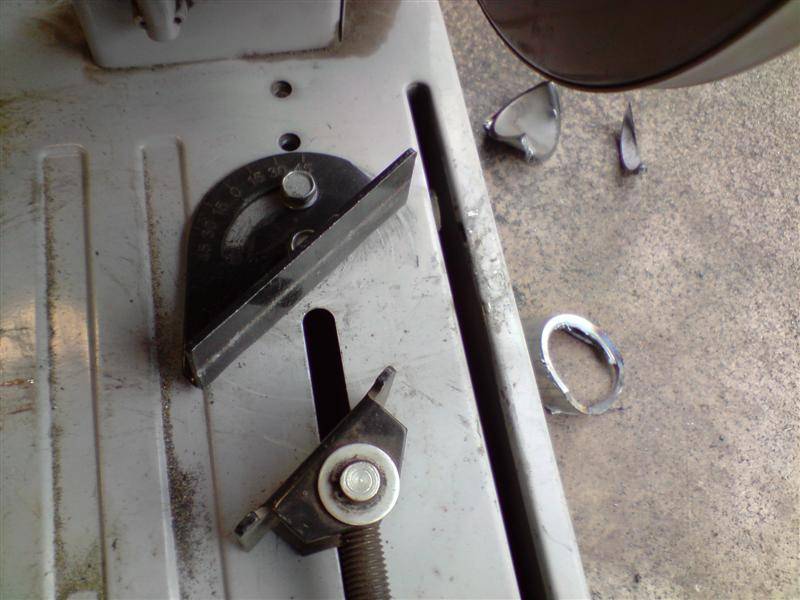
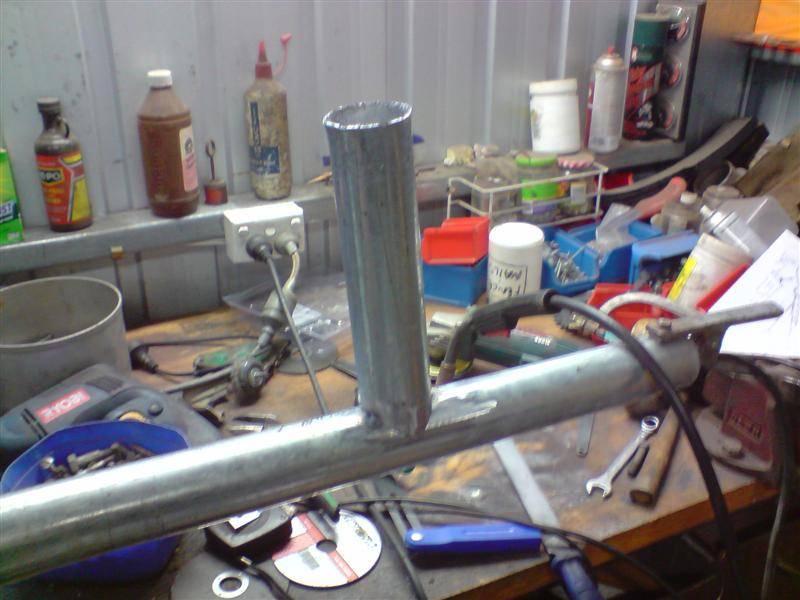
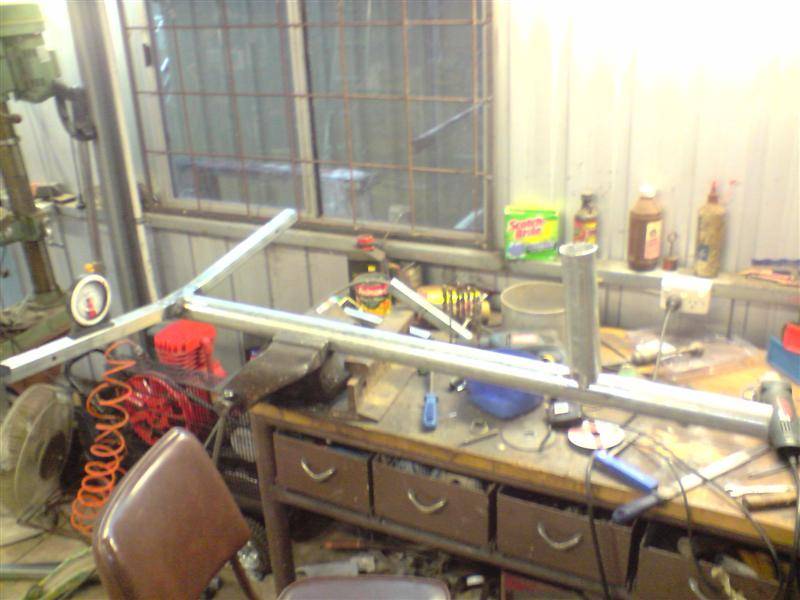
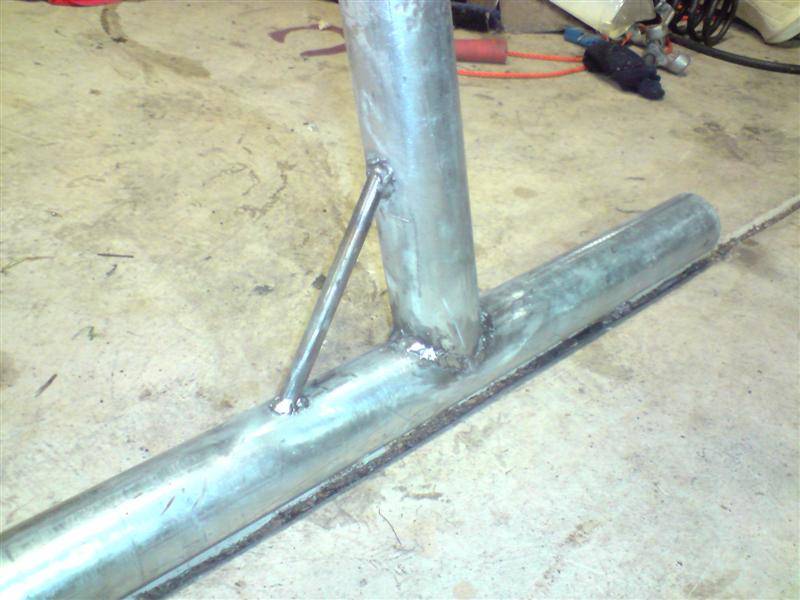
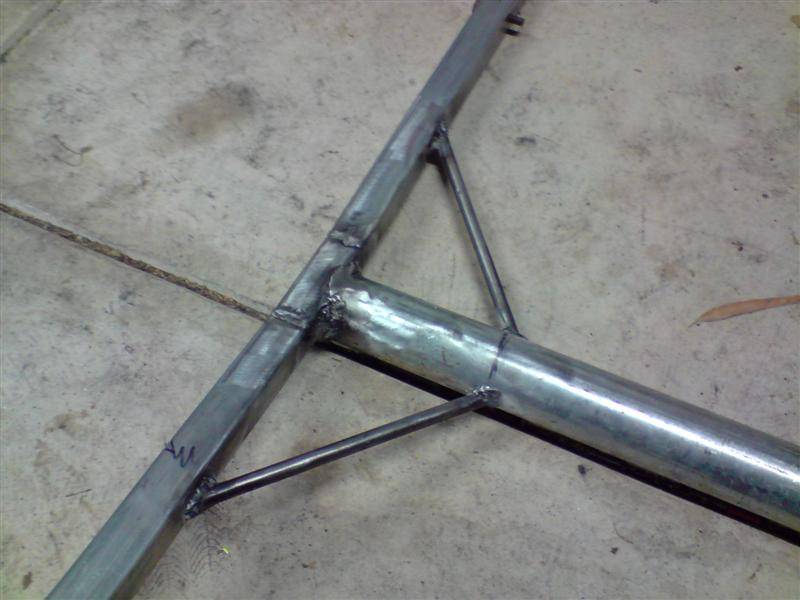
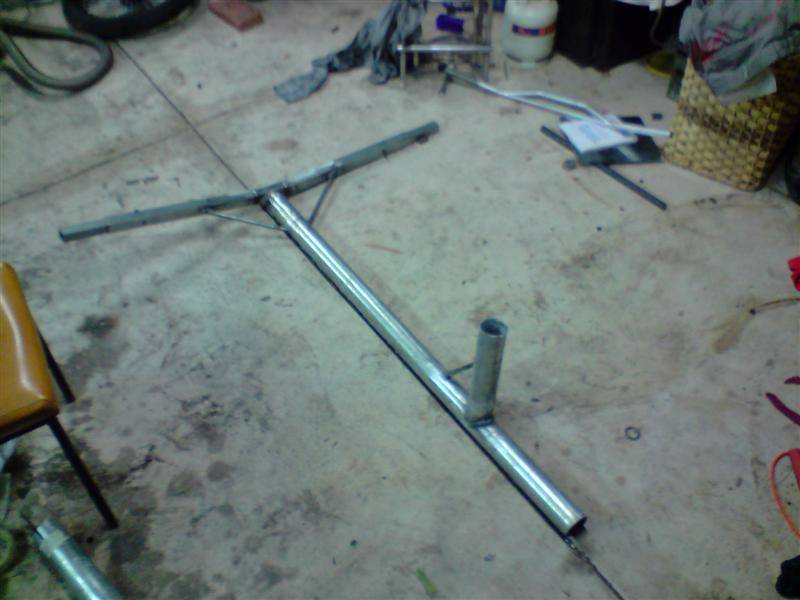
if you look at the photos of our landyacht you can get a pretty good idea of how it all goes together.

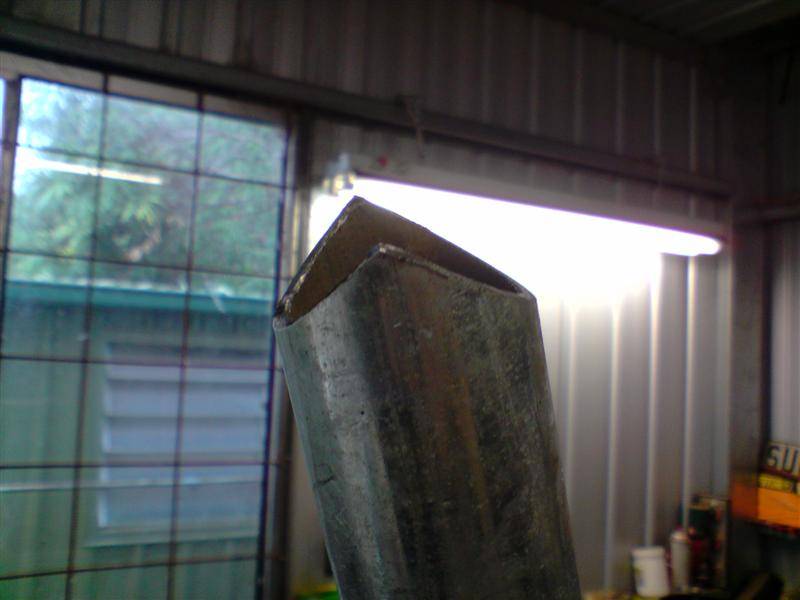
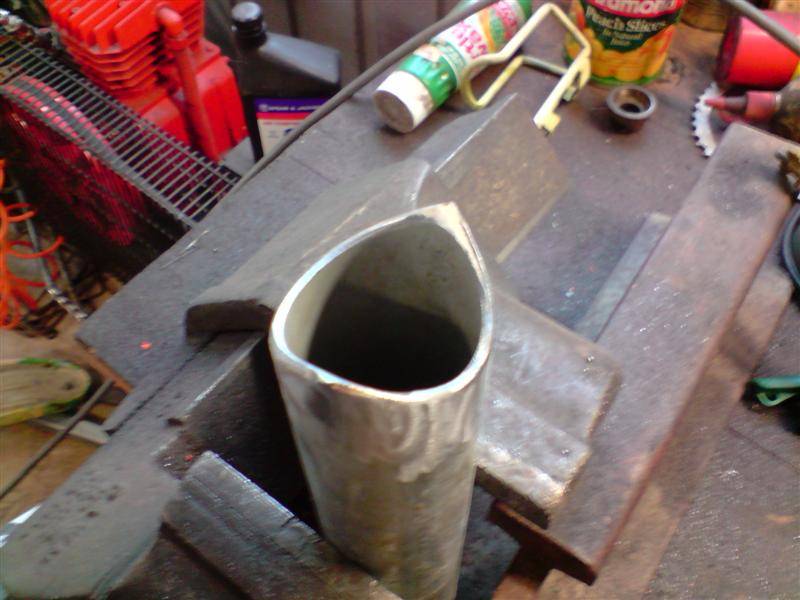
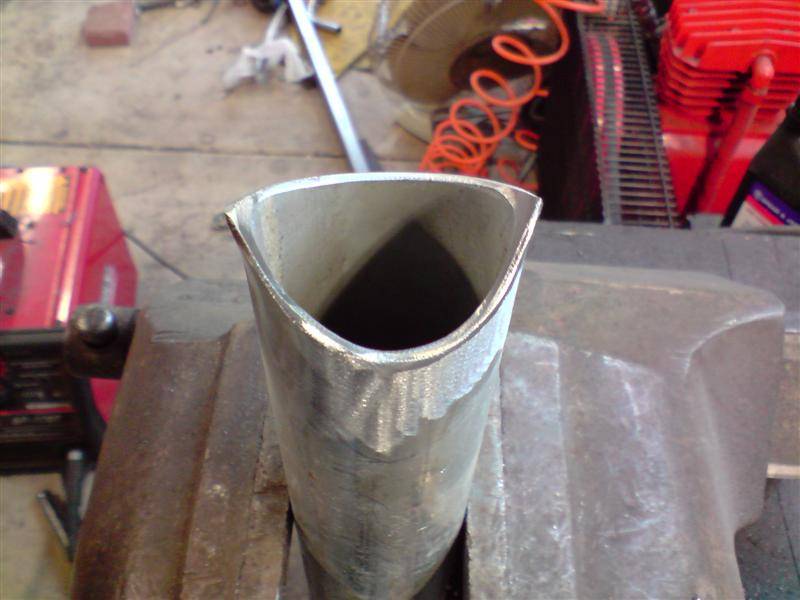
I will try and post a copy of a template which you can wrap around the mast tube to show you where to cut and grind to get the 80 degree angle you need.
If you use the template, you will probably need to do some minor grinding or filing to make the mast step fit the chassis tube.


sn
sn
WA
2775 posts
sn sn
WA, 2775 posts
13 Aug 2009 6:13pm
I am having problems posting an image of the template- will try again later.

here are the photos of the steering on our yacht.


sn
sn
WA
2775 posts
sn sn
WA, 2775 posts
13 Aug 2009 6:50pm
axle extension materials and sizes are on page 6 of this topic thread
Gizmo
Gizmo
SA
2865 posts
SA, 2865 posts
13 Aug 2009 8:39pm
Here is a bit from another thread
www.seabreeze.com.au/forums/topic.asp?TOPIC_ID=51791
I am very impressed of another way of fitting the mast step that might be worth looking at.....

gsand said...

Next up is the Mast tube. I know the plans call for 60x2, but my 3.6wall stuff is a snug fit for the mast (2pc carbon sailboard mast).

Fishmouth the end of the tube for fitting on the 60mm beam, measure + set the angles right and you'll do it properly first time time in the chop saw.

I set the saw to around 37 degrees, made the first cut. flip the pipe around and do the same cut but slightly offset, this will give you the mast rake. finish it off with the flap disc and file. Notching tube like this in a chopsaw can take a while to get the hang of - but once you've got it sorted out theres nothing stopping you from starting a roll cage business!!! (not recommend)


Perfect fit

To get the mast angle true while in the vice, I simply tweaked the chassis around until the angle of both axles was equal (7.5 degrees) and tacked the tube on at a right angle, triple checking the guage


Add the solid brace and Weld it all up!! Sit back and potter around the shed with a proud grin. Also a good time now to "show off" your sloppy welds and workmanship to anyone else in the house who doesn't care the slightest


Thats it for today. Next up is the steering head, but cant make the fork until i get some Fallshaws for this darn thing!!!


Oh and by the way, for anyone interested in the weight using such thick walled steel, the frame as pictured is 11kg. I dont know how much a thinner frame would add up to, but I dont think its too bad. Besides, all the weight thats going to be piloting this machine along isnt going to make the slightest difference to the chassis weight.

at the end of the day its all ballast

Until next time :)


Cameronc
Cameronc
NSW
78 posts
NSW, 78 posts
17 Aug 2009 3:42pm
thanks everyone


so that template?
sn
sn
WA
2775 posts
sn sn
WA, 2775 posts
17 Aug 2009 5:01pm
I tried several times to post the template but it wont work,

If its any help- there is about 11mm difference in the length of the mast tube sides when measured from the top of the tube, to the mast step.

(based on 60mm steel tube, with an 80 degree angle)
pirrad
pirrad
SA
850 posts
SA, 850 posts
17 Aug 2009 7:05pm
What is that tool in previous pics for measuring angles?Never seen one before.
Coremeister
Coremeister
QLD
22 posts
QLD, 22 posts
17 Aug 2009 10:53pm
I guess you are refering to th angle finder, there are a couple of different types about. The one in the pic is a different brand but is thae same as the one in the link below, as there are Blackwoods or A E Bakers in most states these are probalbly the easiest to get hold of, we use a couple of them all the time in our workshop for setting up all sorts of fabrication jobs, the only thing we have that is even better is a digital spirit level, absolutly brillient for setting very accurate angles (accurate to .01 deg) but at close to $450 is probably a bit more than most people need, from memeory the one in the link is less than $80.00.

http://www2.blackwoods.com.au/infoBANKproduct.aspx?SG=2000165&S=31&G=2004743&P=2028310

If the link doesnt work go to Blackwoods and search the catalouge with the key word angle then scroll down and click on Magnetic Angle Level.

Hope this helps

Corey
Cameronc
Cameronc
NSW
78 posts
NSW, 78 posts
18 Aug 2009 11:22am
put it on photo bucket or image shack or email me
*************************
landyacht
landyacht
WA
5921 posts
WA, 5921 posts
18 Aug 2009 9:30pm
Cam , take your email address off the thread and PM sn the details. you may end up getting spammed
Cameronc
Cameronc
NSW
78 posts
NSW, 78 posts
19 Aug 2009 11:13am
dont worry iv done it now anyway thanks anyway
sn
sn
WA
2775 posts
sn sn
WA, 2775 posts
19 Aug 2009 9:00pm
I am back at sunrise dam, and will be here for 2 weeks

and I left the template back at home........
(cant scan stuff here anyway)

sorry Cam
Cameronc
Cameronc
NSW
78 posts
NSW, 78 posts
20 Aug 2009 9:54am
its fine i drew my own template and cut it yesterday on the grinder and it fitted perfect @ 80 degrees now today im just putting mast step brace , finishing flow coat on seat and try and make a start on the front steering
landyacht
landyacht
WA
5921 posts
WA, 5921 posts
21 Aug 2009 2:07pm
Great going cam , keep it up
Cameronc
Cameronc
NSW
78 posts
NSW, 78 posts
23 Aug 2009 2:49pm
going to cut sail soon ( well mask where to cut and get someone to sew it back up for me) ummm just wondering is it 6 pulleys i need?
Cameronc
Cameronc
NSW
78 posts
NSW, 78 posts
23 Aug 2009 3:47pm
just some pictures of my seat which is now done and a check before i get sail cut if its right or not?


landyacht
landyacht
WA
5921 posts
WA, 5921 posts
23 Aug 2009 7:05pm
you wont need the pulley in the middle of the boom, so that makes 5
Cameronc
Cameronc
NSW
78 posts
NSW, 78 posts
23 Aug 2009 9:14pm


Cameronc
Cameronc
NSW
78 posts
NSW, 78 posts
24 Aug 2009 4:58pm
could someone please draw on that picture above on where i should cut or ill just cut where i have drawn in photoshop project is due in about a week and a bit and will take about a week to get cut and have back at my house thankyou .
Please Register, or first...
Topics Subscribe Reply